With AI as my teacher, I built a brain-computer interface from the ground up.
The BCI Project is a real EEG/BCI system I have been building from scratch: custom hardware, firmware, an app, signal processing, and early ML. I started with the idea before I had the skills. I did not know PCB design, and I barely understood EEG. AI helped me learn the missing pieces, but the board still had to power on, stream data, and measure a real signal.
Hardware
Status V3 working, 8ch headset in progress
- ADC ADS1299, 24-bit, filters
- MCU ESP32-C3
- EEG 8-ch @ 250 Hz
- IMU 6-axis motion
- Power Li-Po, USB-C charging
- Safety Charge mgmt + shutoff
Firmware
Status Fully operational
- Runtime C / ESP-IDF
- RTOS FreeRTOS
- Sample 8-ch @ 250 Hz
- Packets Cyton-compatible
- BLE Batched NUS
- Live Gain, bias, lead-off
Software
Status iOS and macOS app in active development
- UI Native SwiftUI
- Apps iOS + macOS
- Link BLE streaming
- DSP FFT + band power
- ML On-device classifier
DSP & ML
Status Early classifiers, signal quality checks
- DSP Filter + FFT
- Features Band power
- Data Labeled trials
- Models Face + eye states
- Active Motor patterns
This is where the specs live today. Hardware and firmware are solid. The app, DSP, and ML work is still ongoing.
Hardware & Firmware
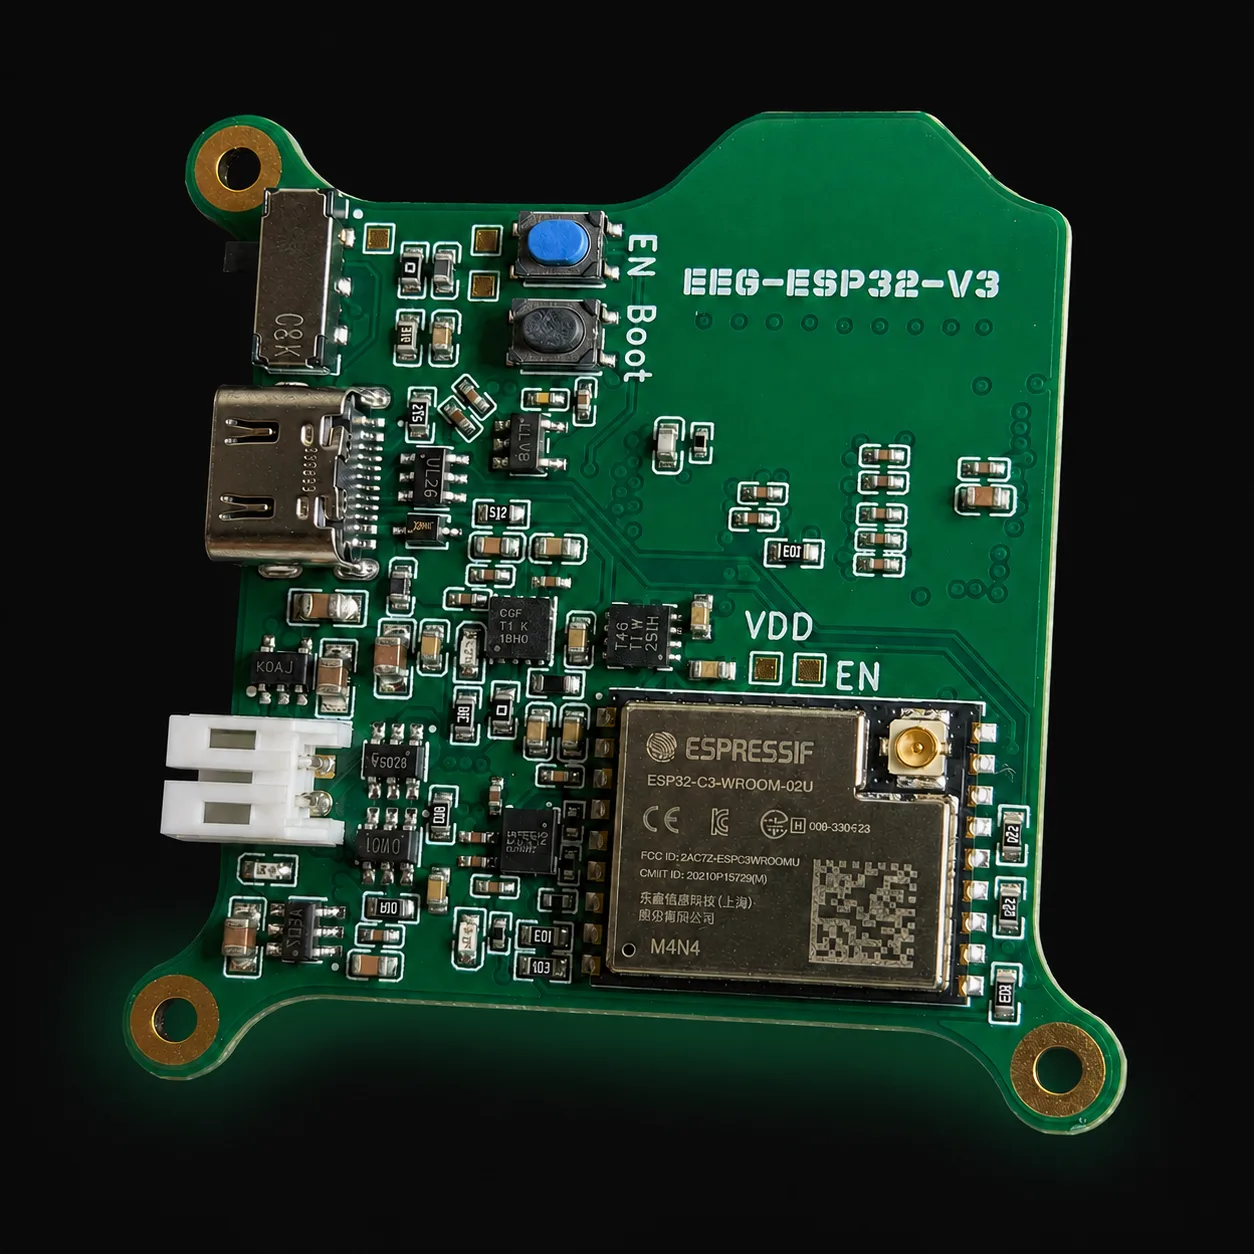
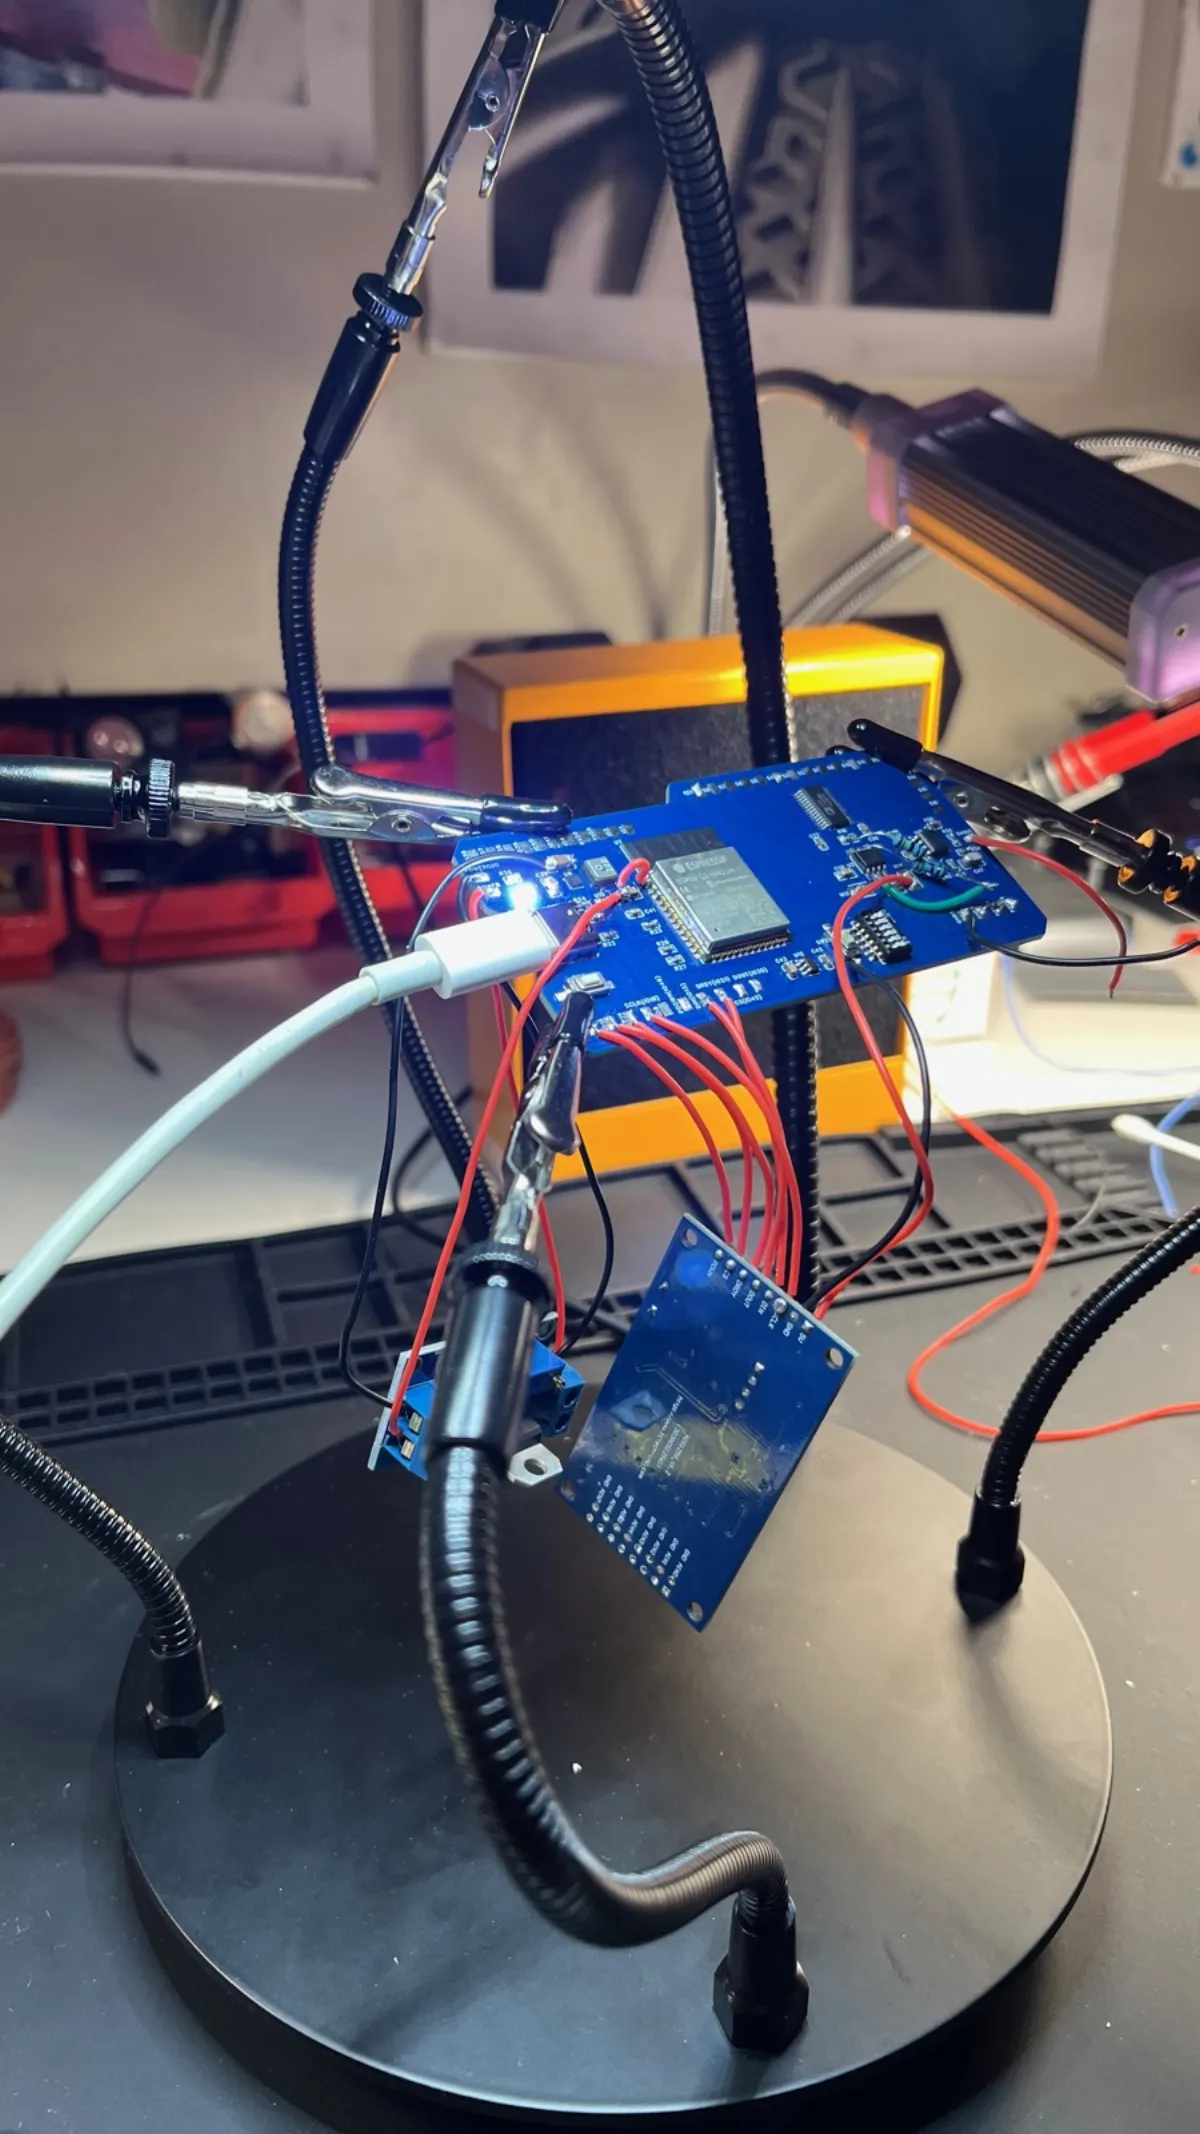
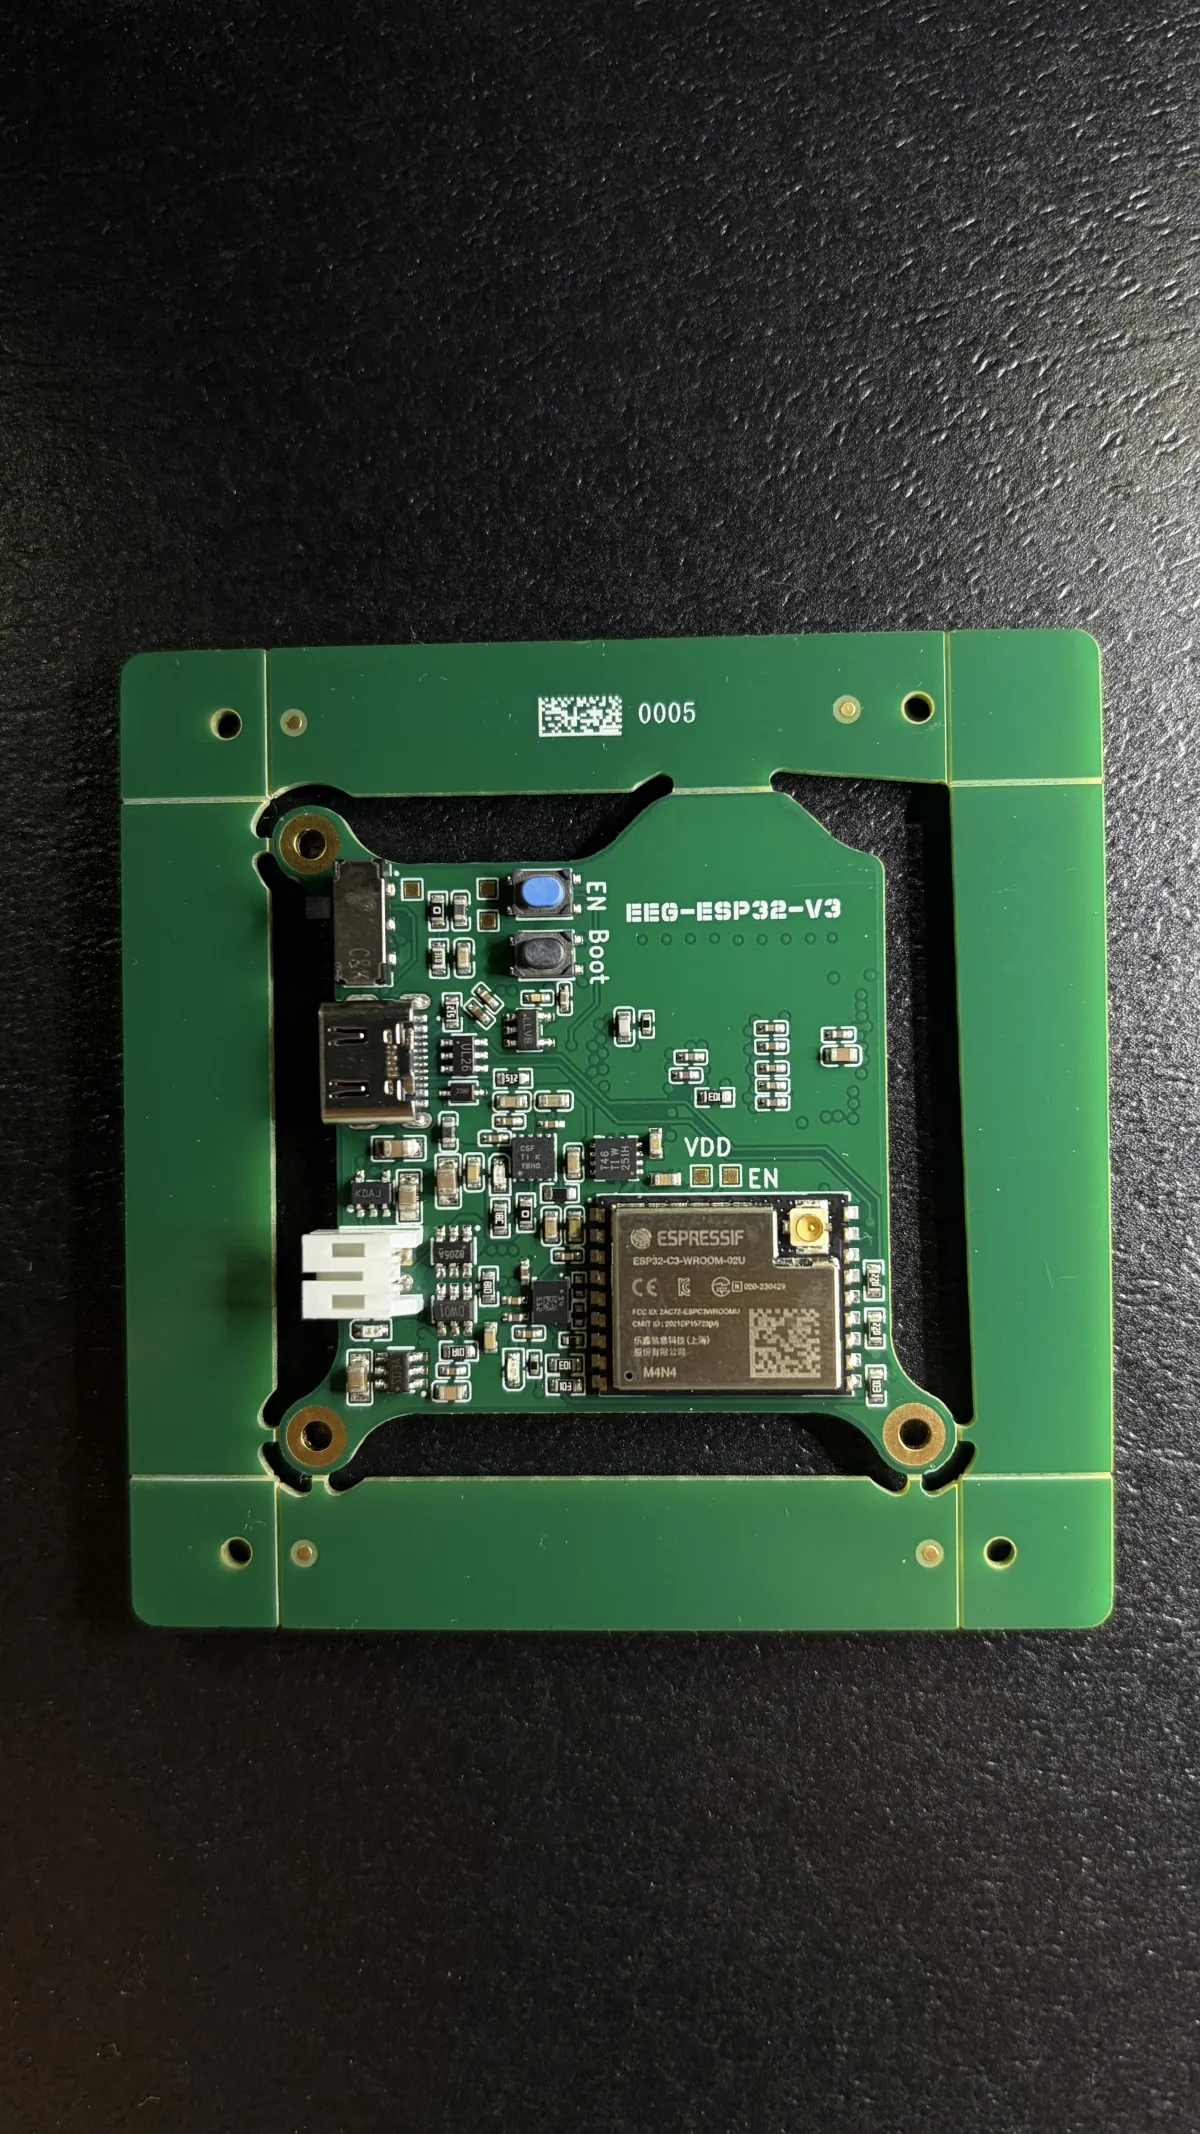
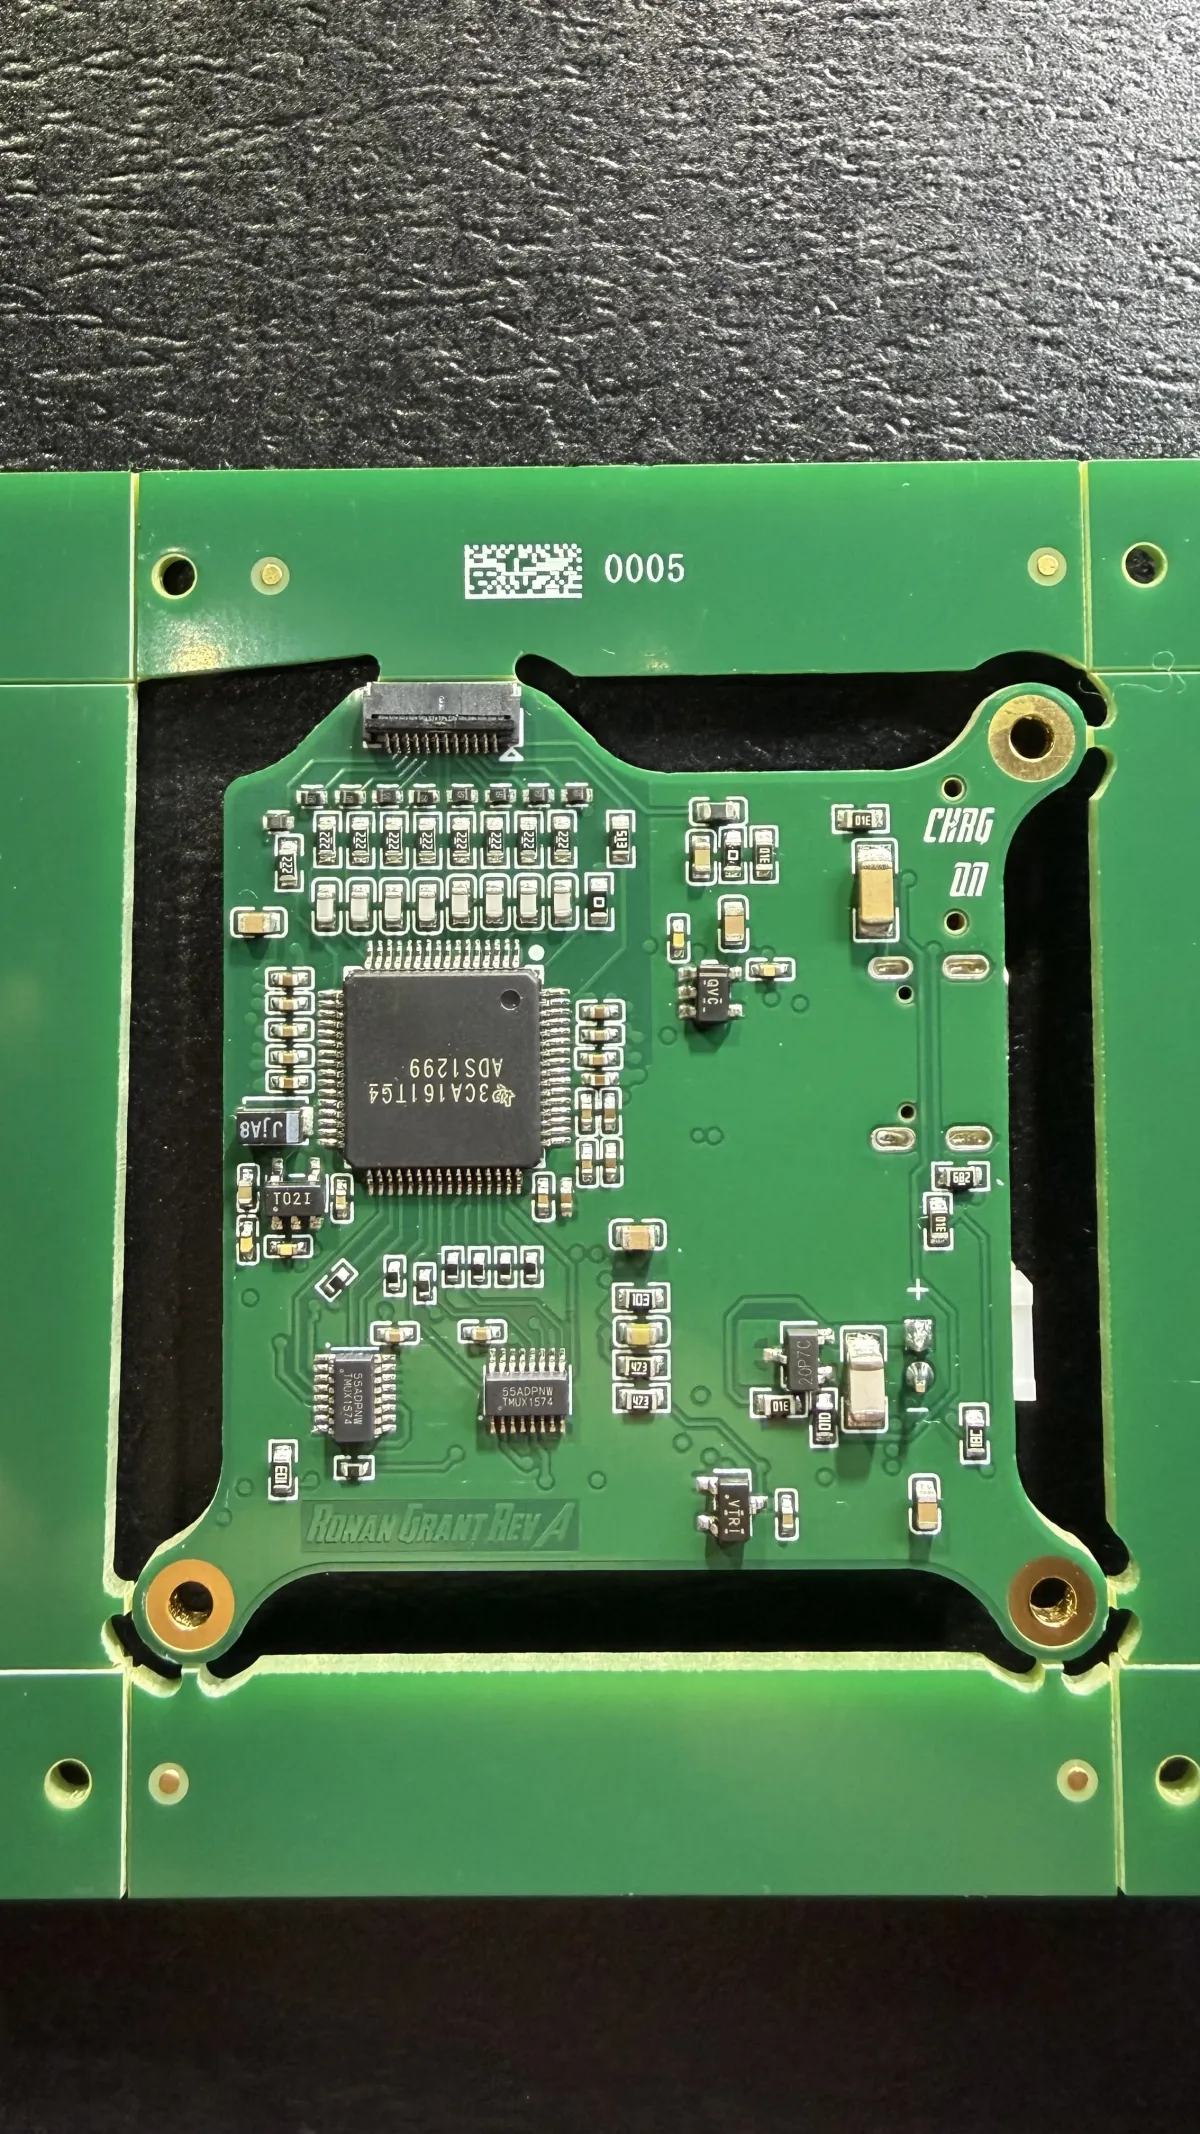
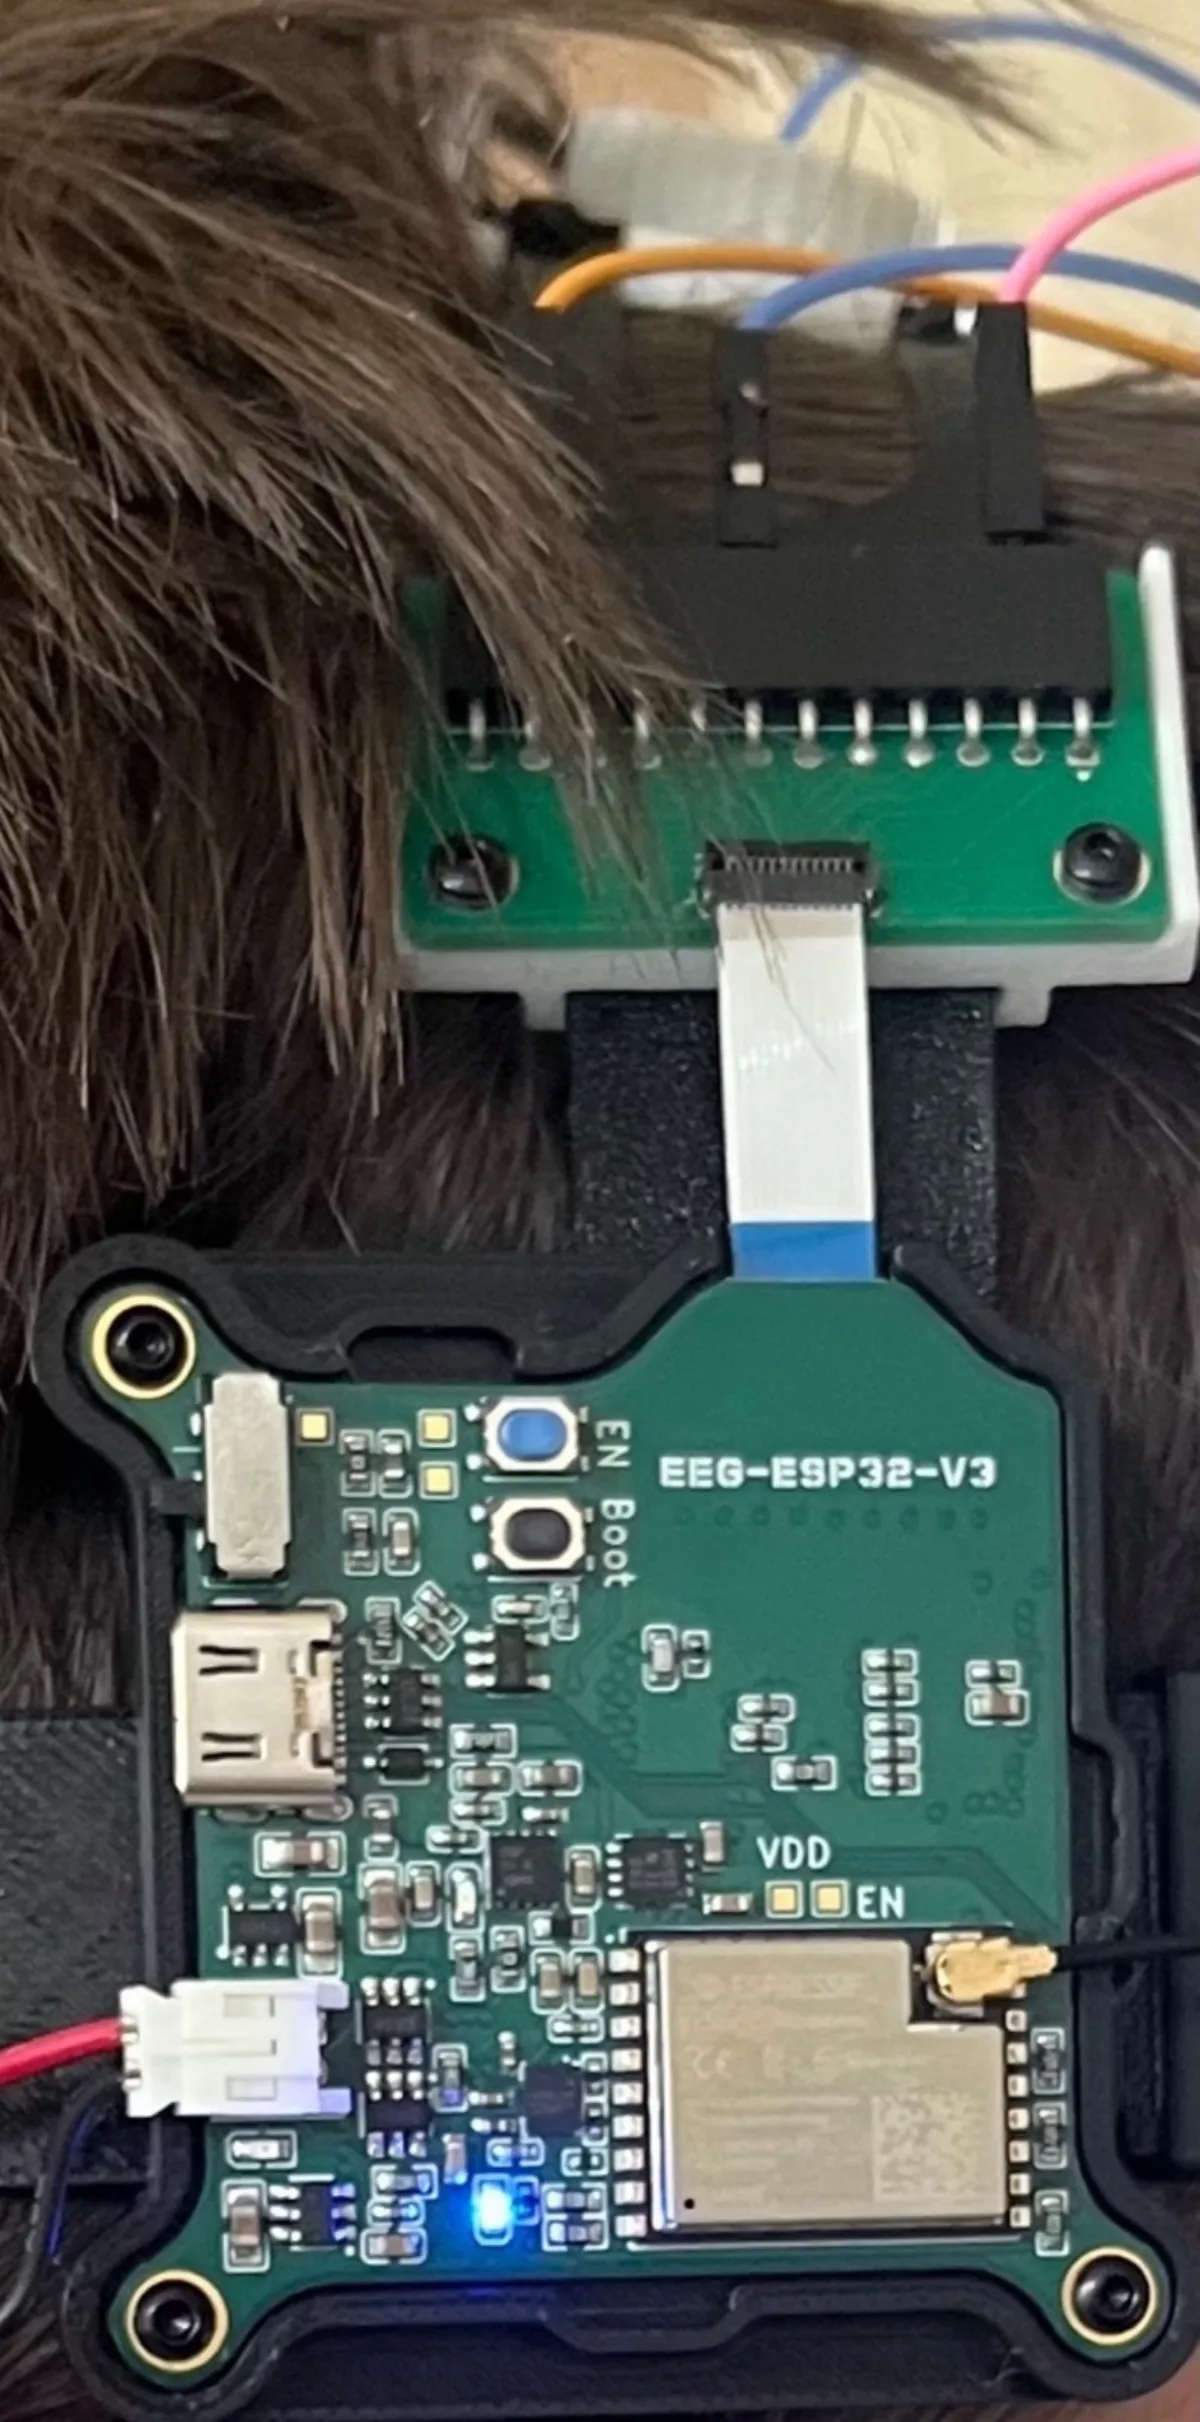
Custom EEG hardware. The board is built around the TI ADS1299, a 24-bit, 8-channel analog front end made for EEG and other tiny biosignals. It is demanding to design around: most of the V3 work went into keeping the quiet EEG side isolated from the noisy ESP32 and power circuitry, which is why this revision is a 6-layer board. The goal was never just to make it power on. It was to measure real EEG, and this board did it first try.
Continue reading
Firmware acquisition pipeline. An ESP32-C3 runs the firmware in C / ESP-IDF on FreeRTOS. It waits for the ADS1299 data-ready signal, reads all 8 channels over SPI at 250 Hz, adds IMU data, and streams Cyton-compatible packets over BLE and USB serial. The firmware also handles batching, buffers, Bluetooth MTU negotiation, and keeping the stream stable when the app or connection slows down.
Integrated power and protection. The board runs on a Li-Po battery, charges and runs over USB-C, and handles charge management, automatic shutoff, power-path switching when plugged in, ground protection, and ESD/transient input protection.
Low power, controlled live. The ESP32-C3 draws very little power and runs across a wide input-voltage range. Gain, input mode, bias, lead-off, test signals, and per-channel enable are all configurable in real time from the app, over both Bluetooth and serial, with battery percentage and status LEDs on the board itself.
Designed in KiCad · 6-layer · 40 × 40 mm · 177 components · 274 vias
Software
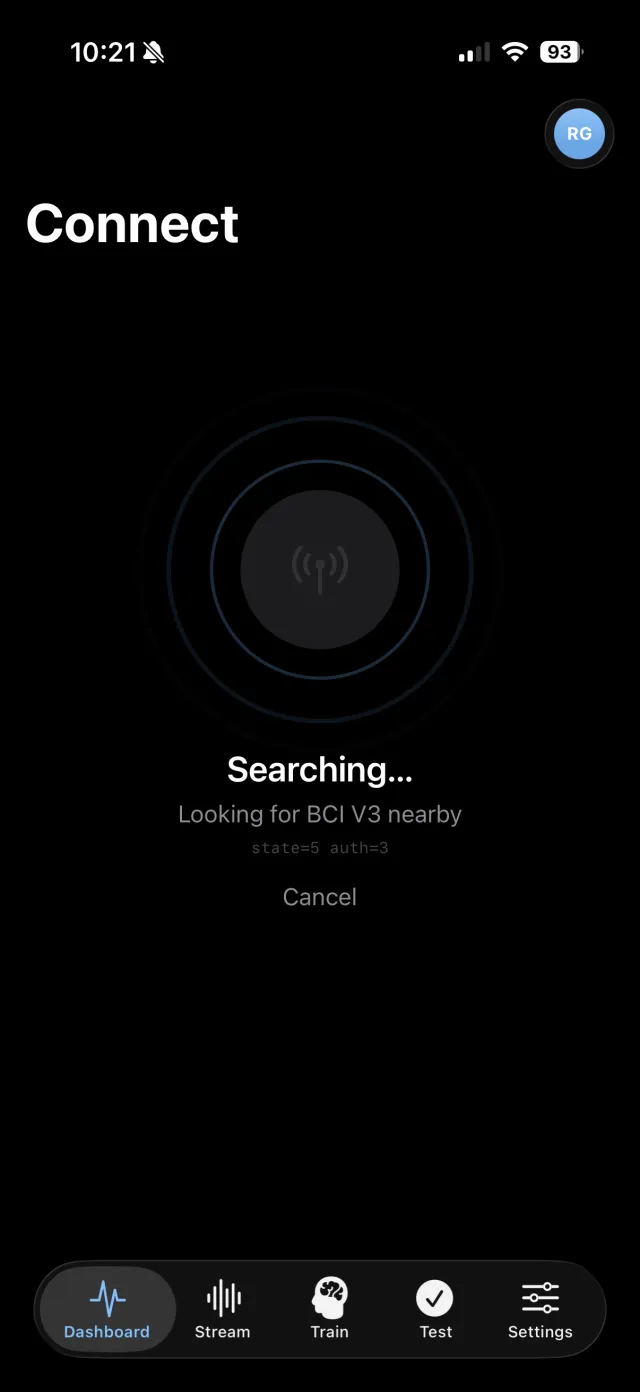
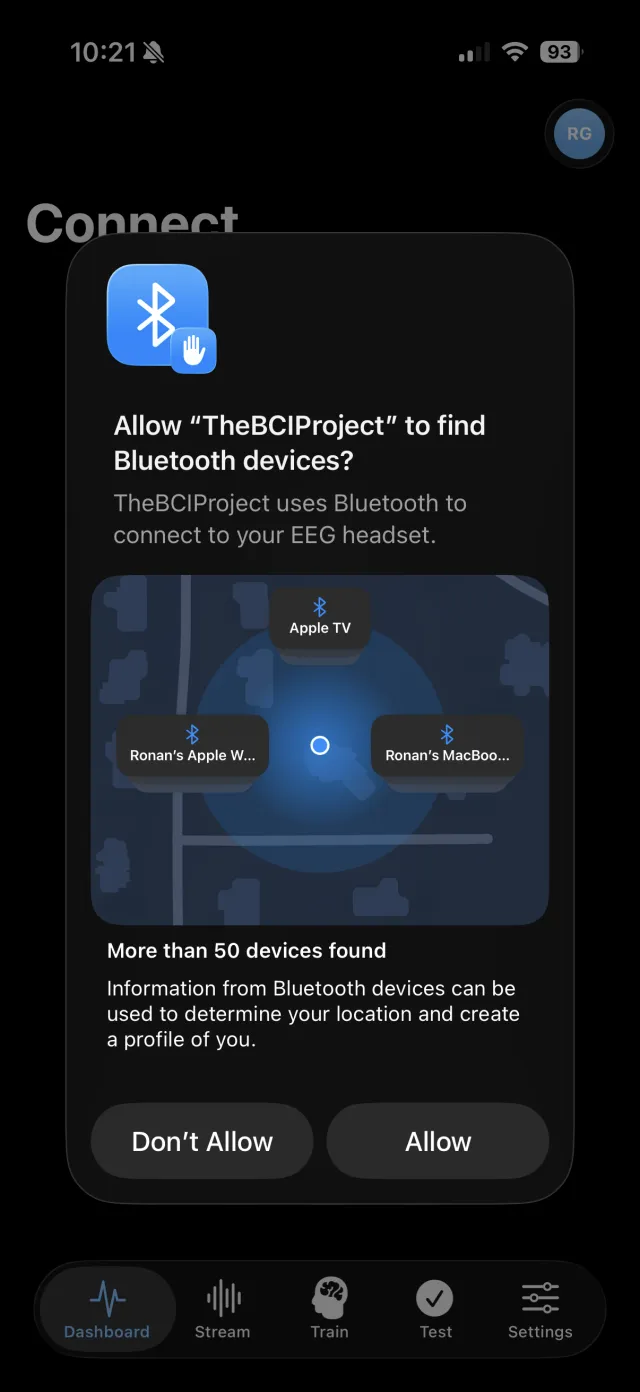
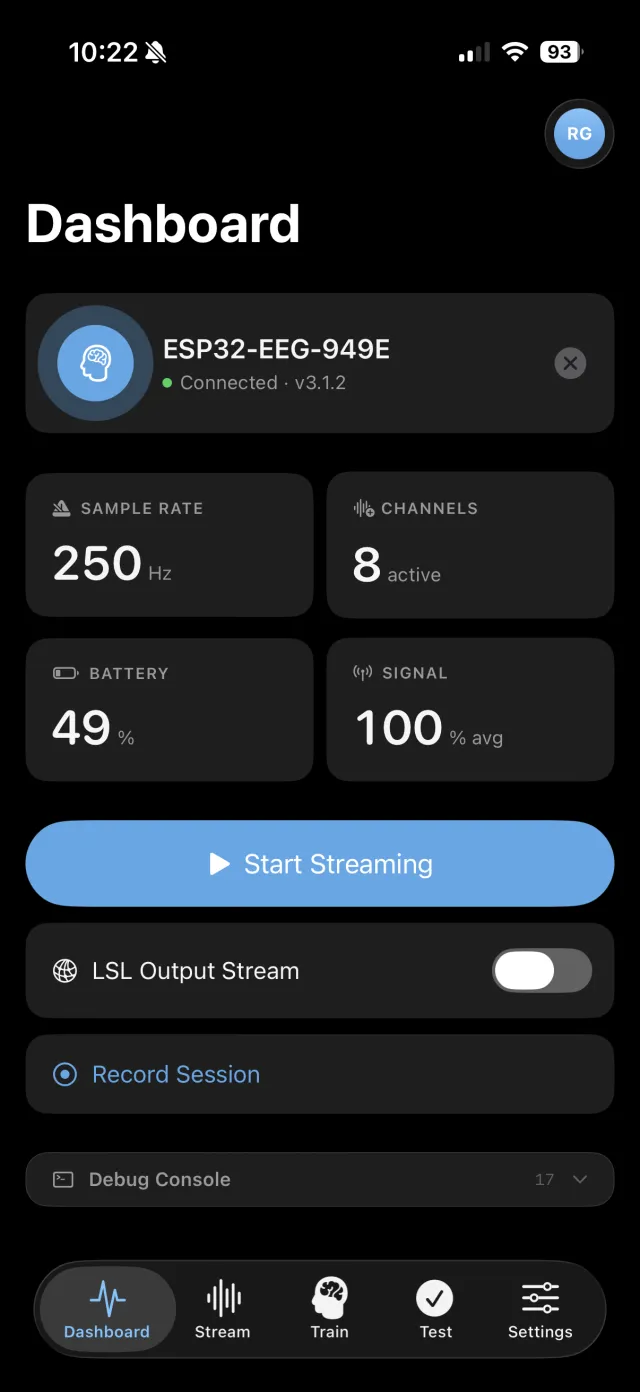
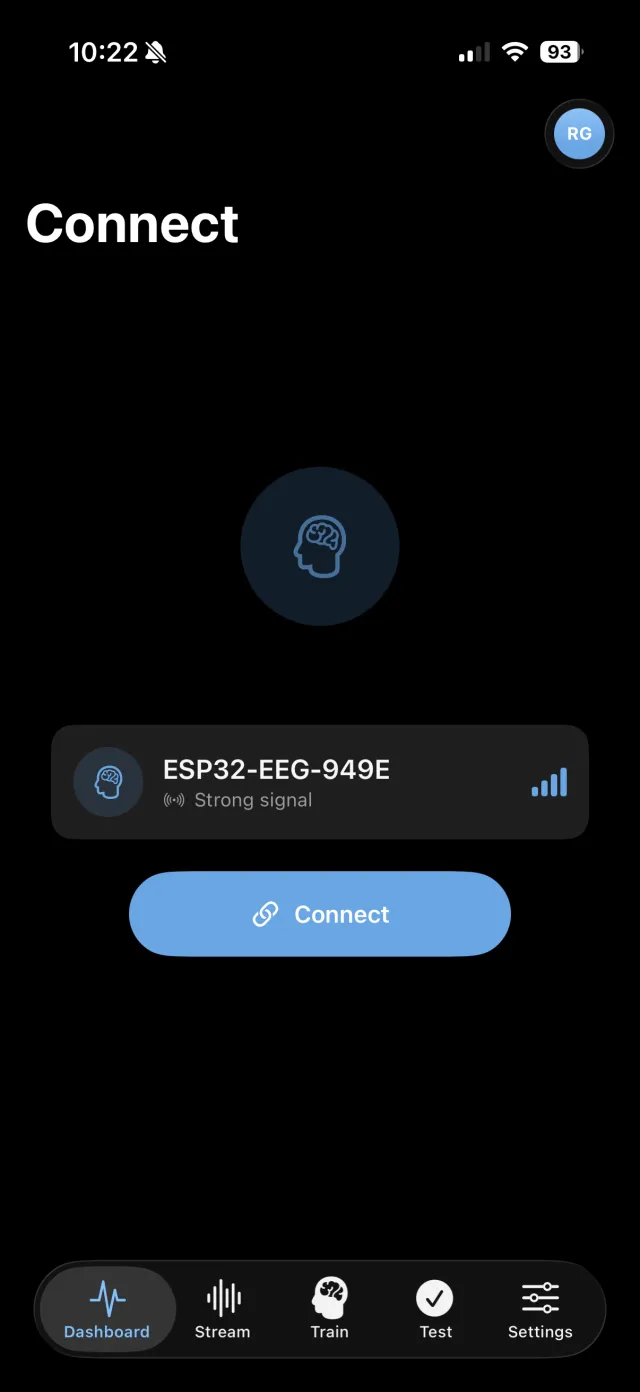
Native app, real hardware control. The BCI runs through a native SwiftUI app for iOS and macOS, built from one codebase. It connects over CoreBluetooth, streams samples continuously, and keeps acquisition, visualization, signal processing, and experiments inside the app.
Continue reading
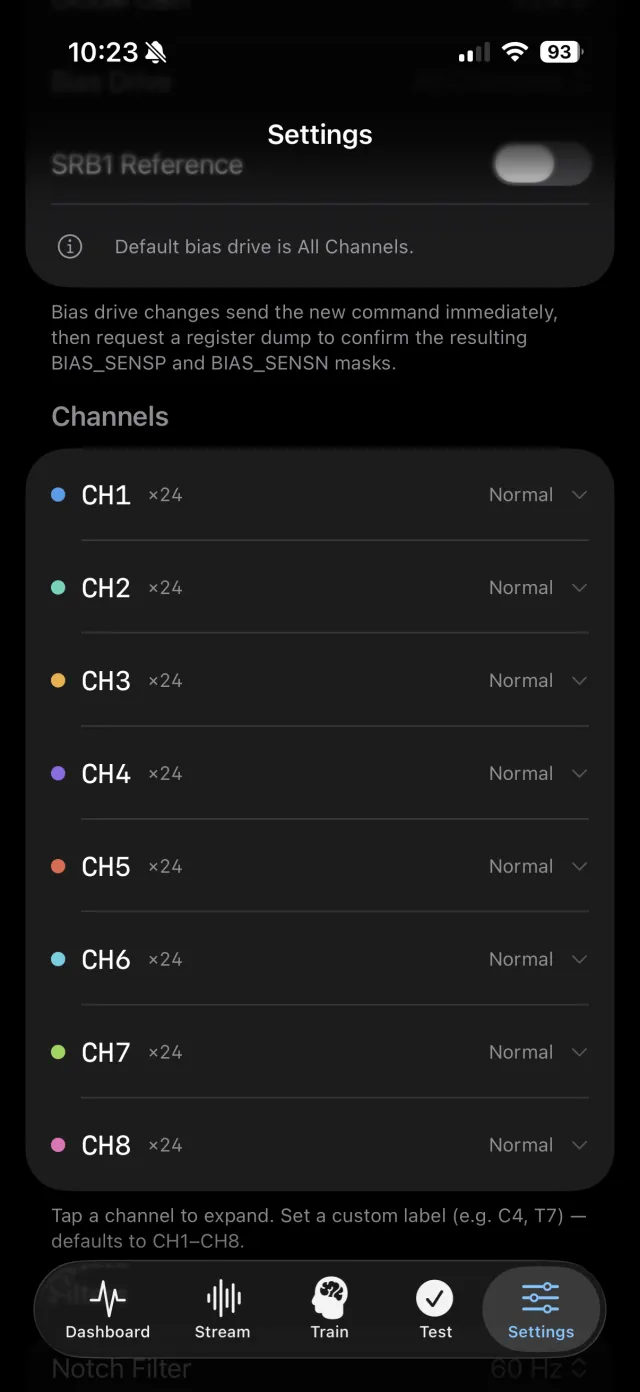
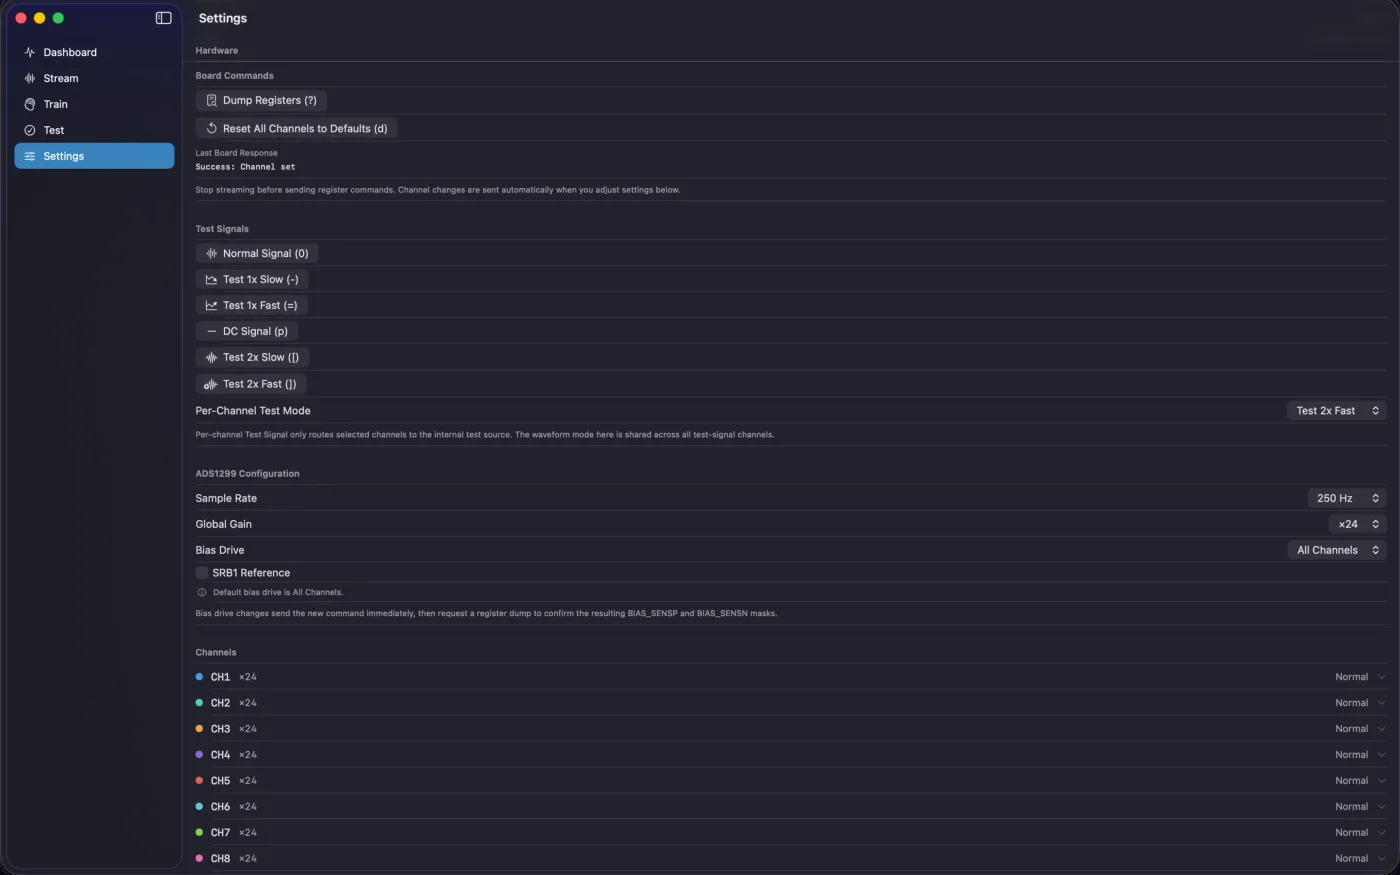
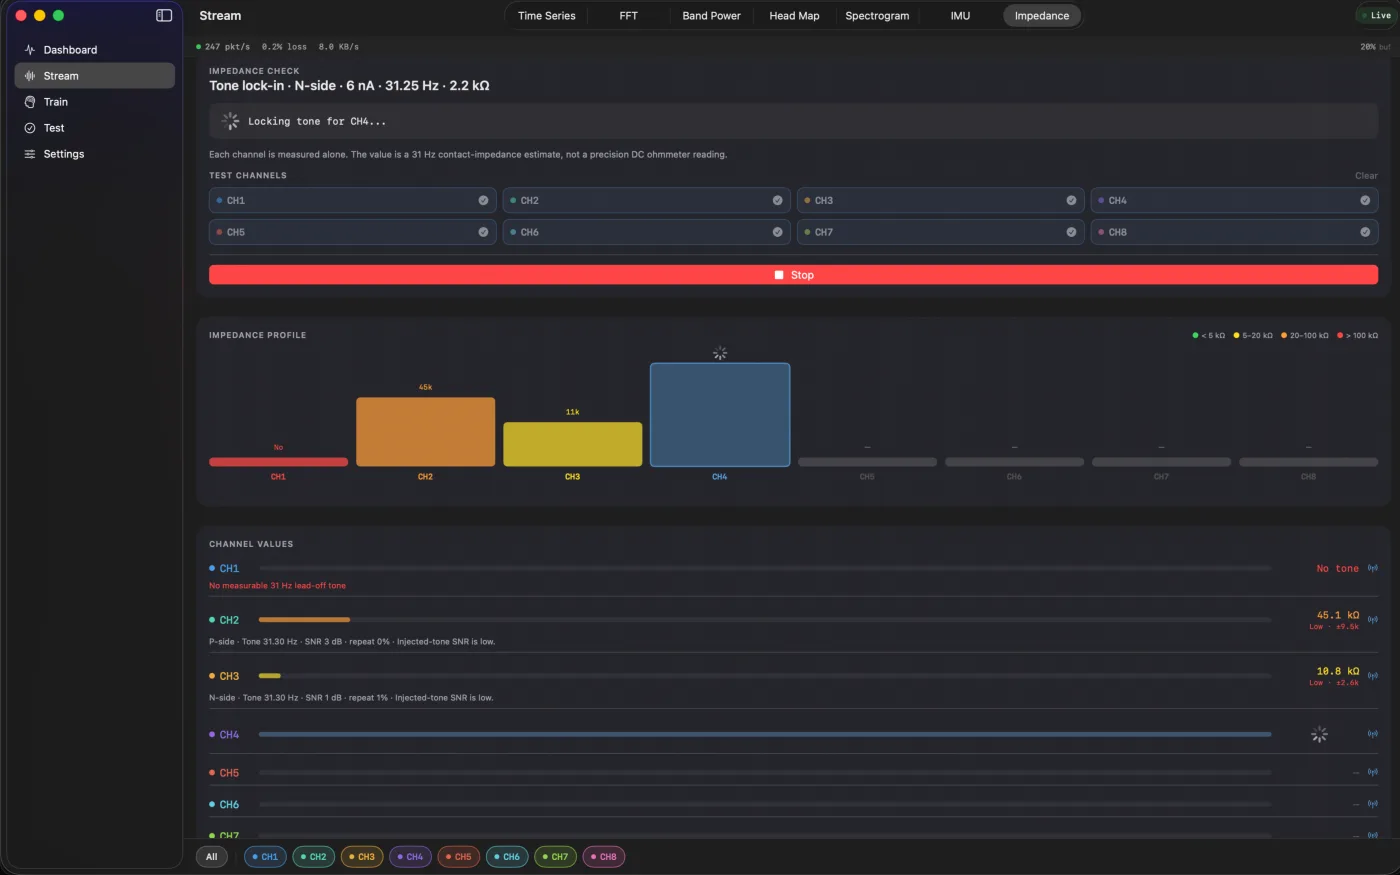
ADS1299 control from the interface. The app is a full frontend for the analog front end. Per-channel gain, SRB1 routing, bias drive, impedance checks, lead state, test signals, input shorting, square waves. All of it is exposed and takes effect immediately when changed.
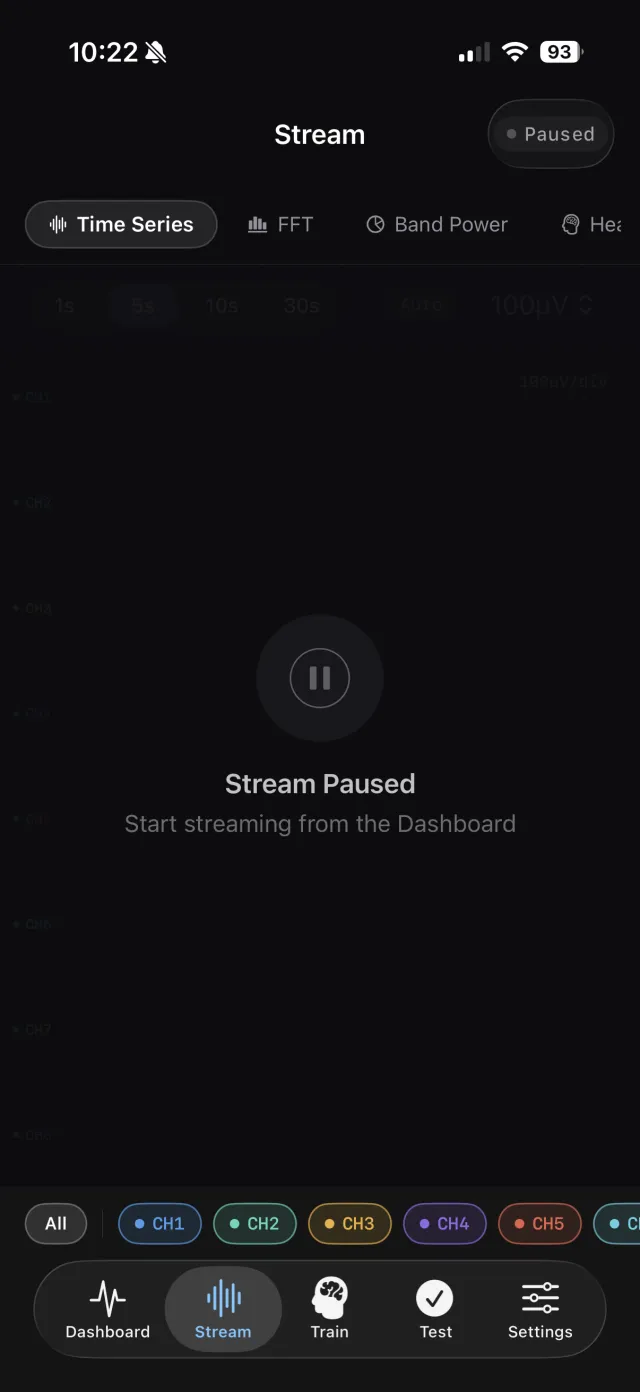
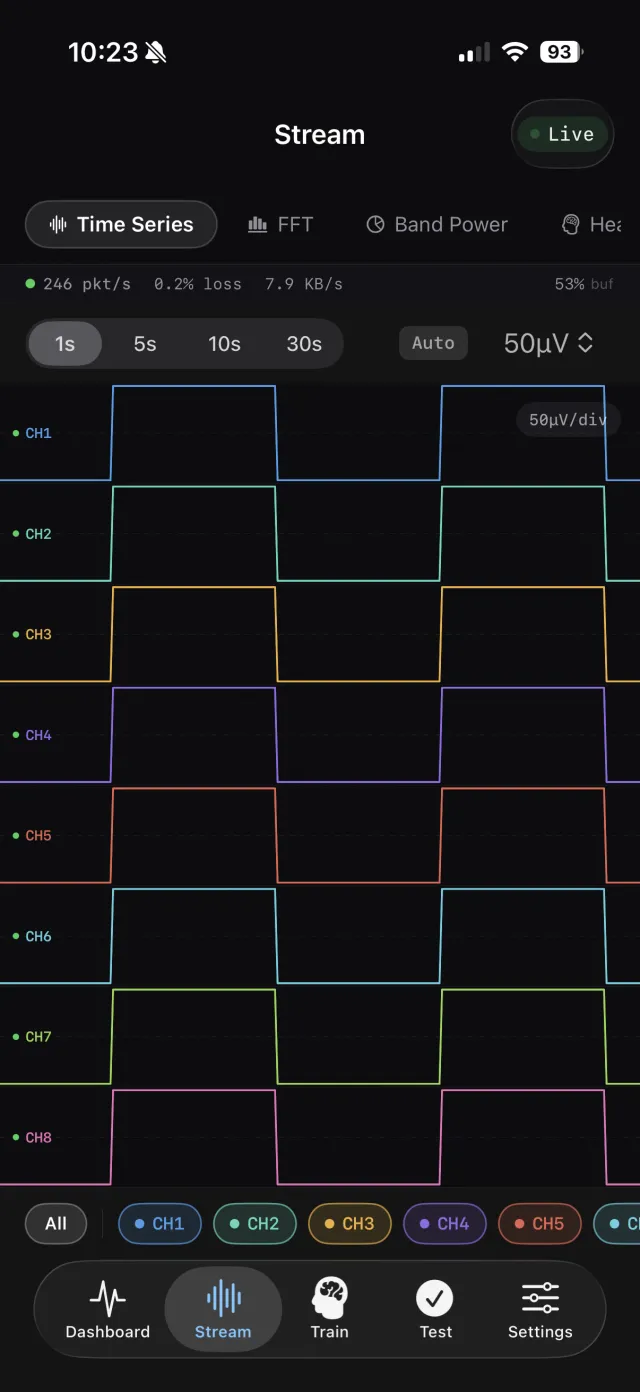
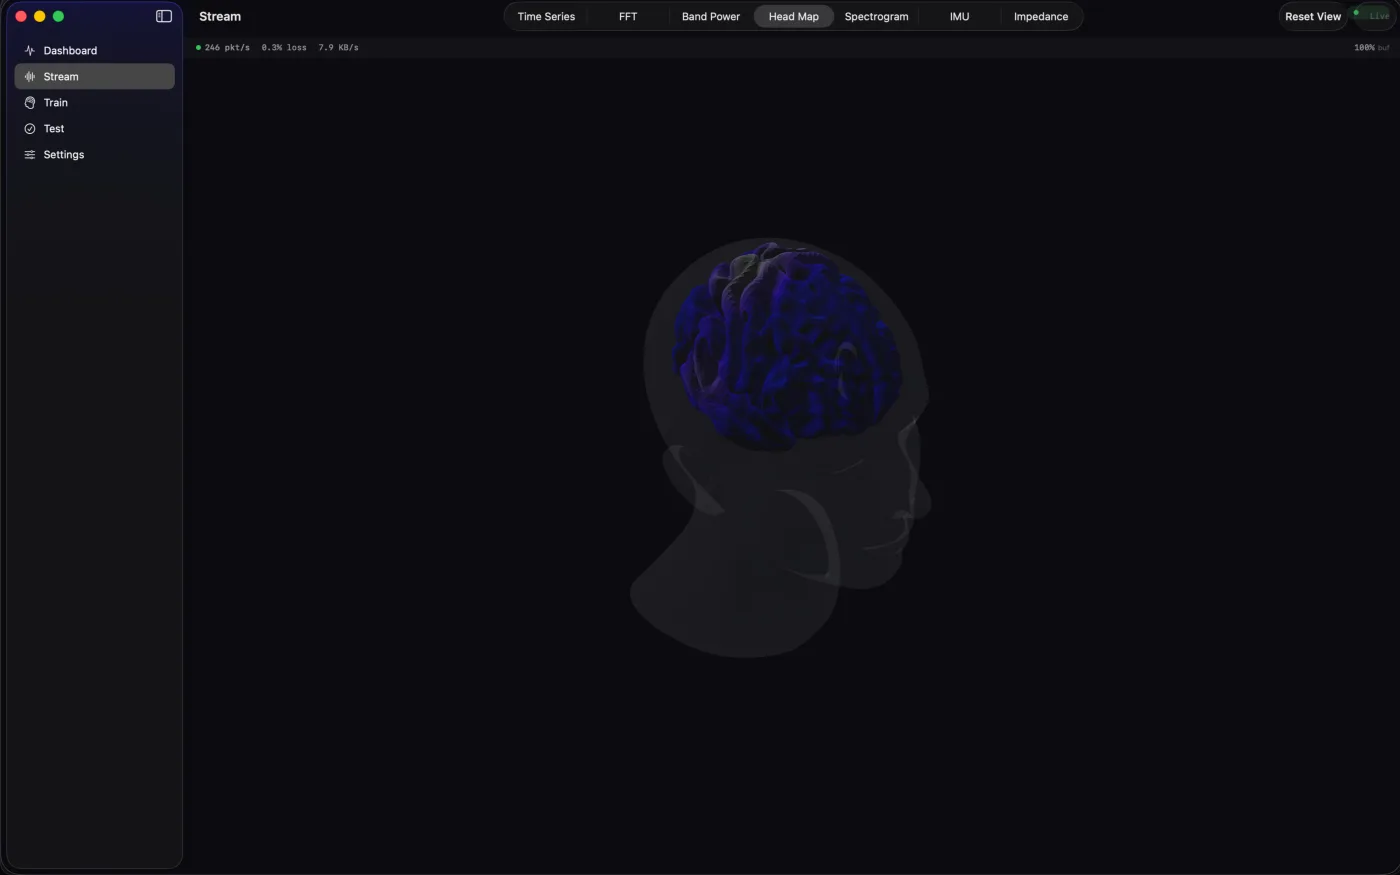
Live views and validation. Channels render live across multiple views: raw signal, FFT, band power, each in its own tab. Data can be recorded and exposed on the network. New tabs can be added fast. Early validation started with EMG at various spots on the scalp, then alpha suppression at O1/O2 with eyes open versus closed, and eventually photic driving: flashing a light and watching it show up in the signal.

Signal Processing & ML
FP1 · FP2 · T7 — on-device EEG classifier for jaw clench and brow movement
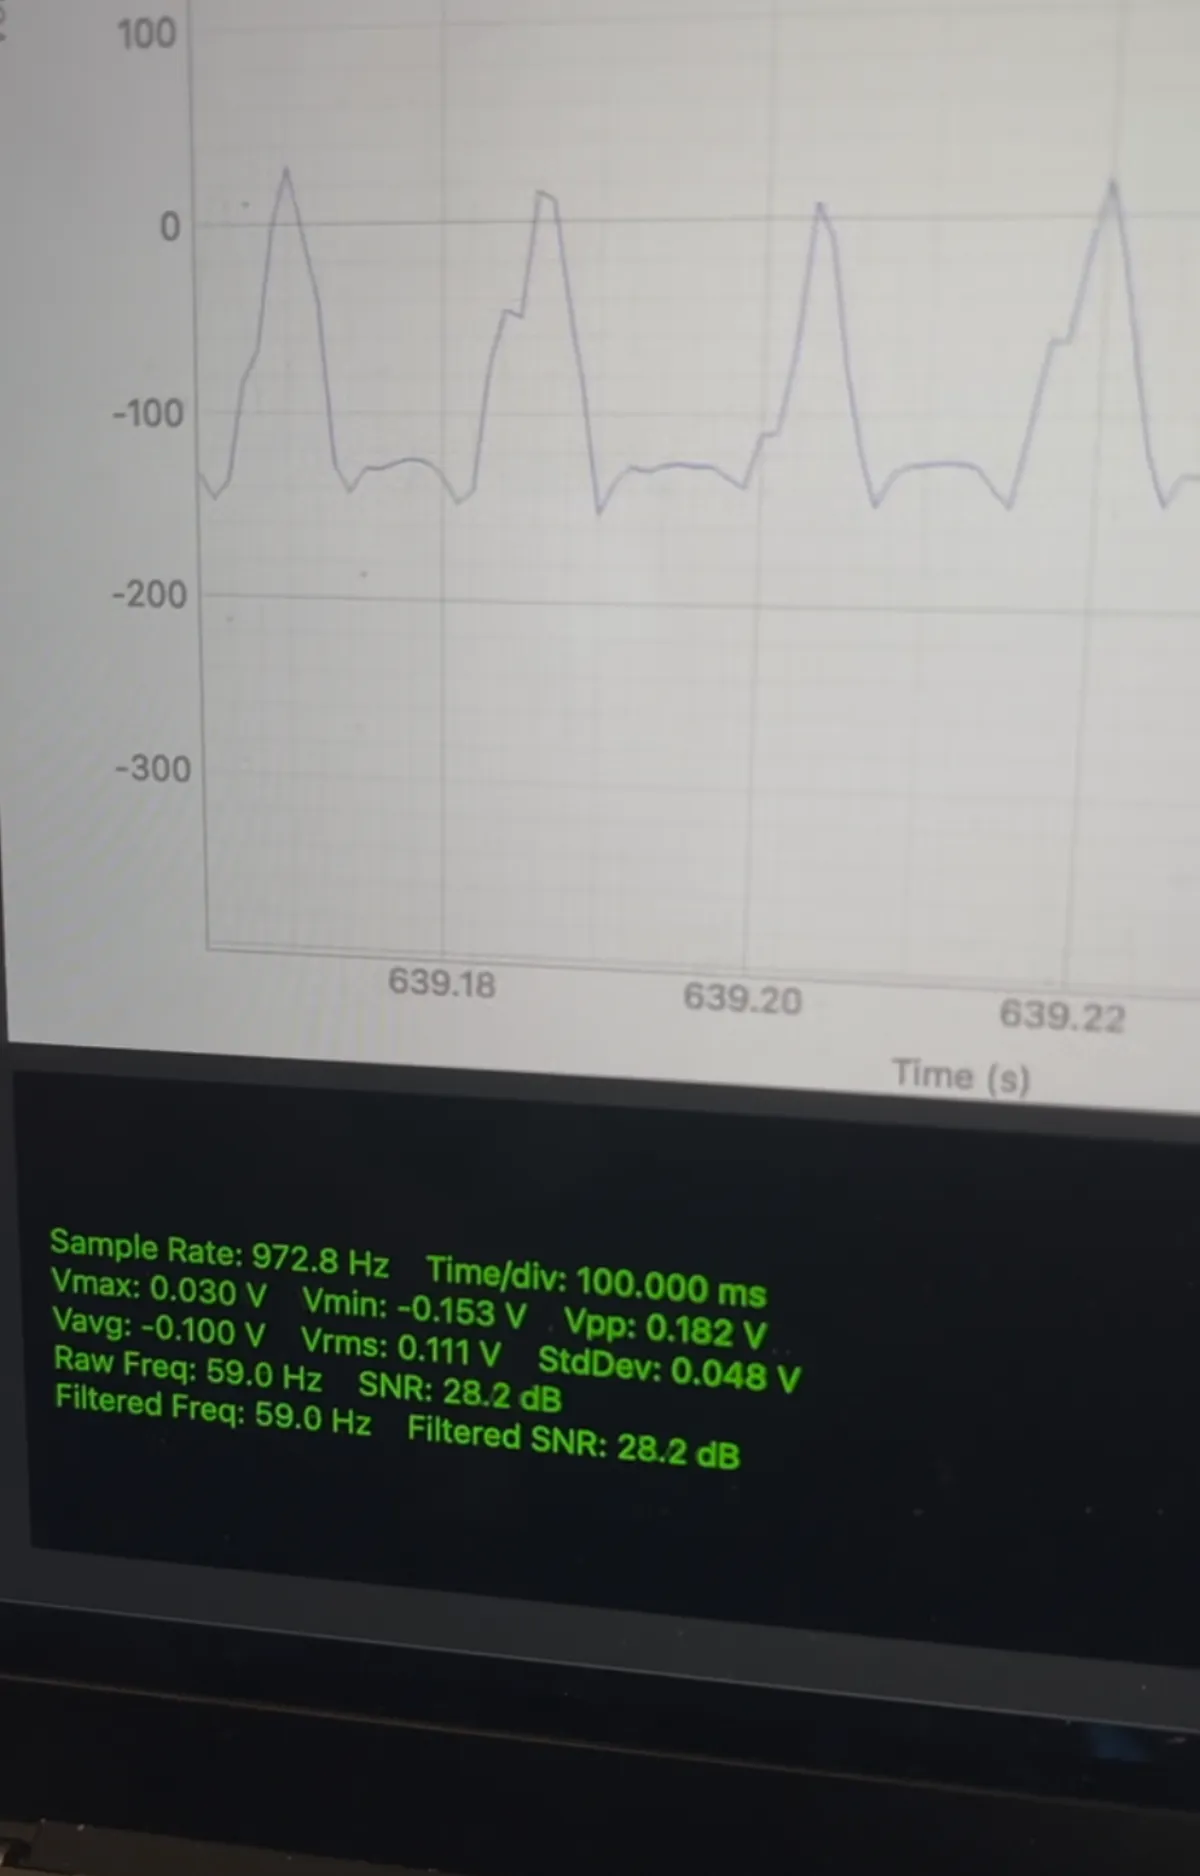
Real-time DSP pipeline. Raw 24-bit samples arrive over BLE, pass through filtering, feed an FFT engine, and turn into live EEG band-power features across delta, theta, alpha, beta, and gamma. The same pipeline powers visualization, validation, data collection, and model experiments.
Continue reading
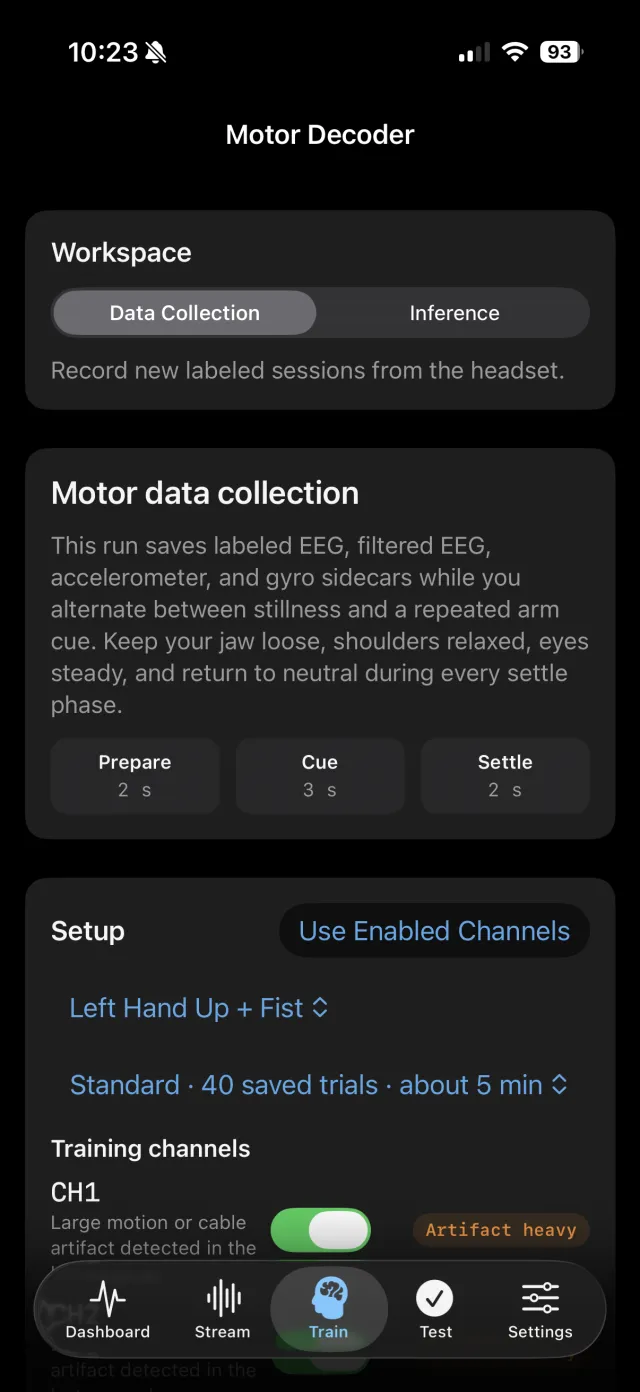
Trained classifiers, not just charts. The project includes labeled trial capture and multiple early ML experiments: facial pattern recognition for jaw clench / face movement, eye-state detection for open vs. closed eyes, and early motor-pattern experiments. The app is built to collect data, label it, extract features, train models, and test them against live signal.
Validation first, motor imagery next. Early facial-pattern classifiers on FP1/FP2/T7 helped validate the acquisition pipeline, then alpha suppression at O1/O2 confirmed eyes-open vs. eyes-closed neural signal. Current research is moving toward movement-related patterns such as mu rhythm changes around C3/C4 for left/right motor imagery.
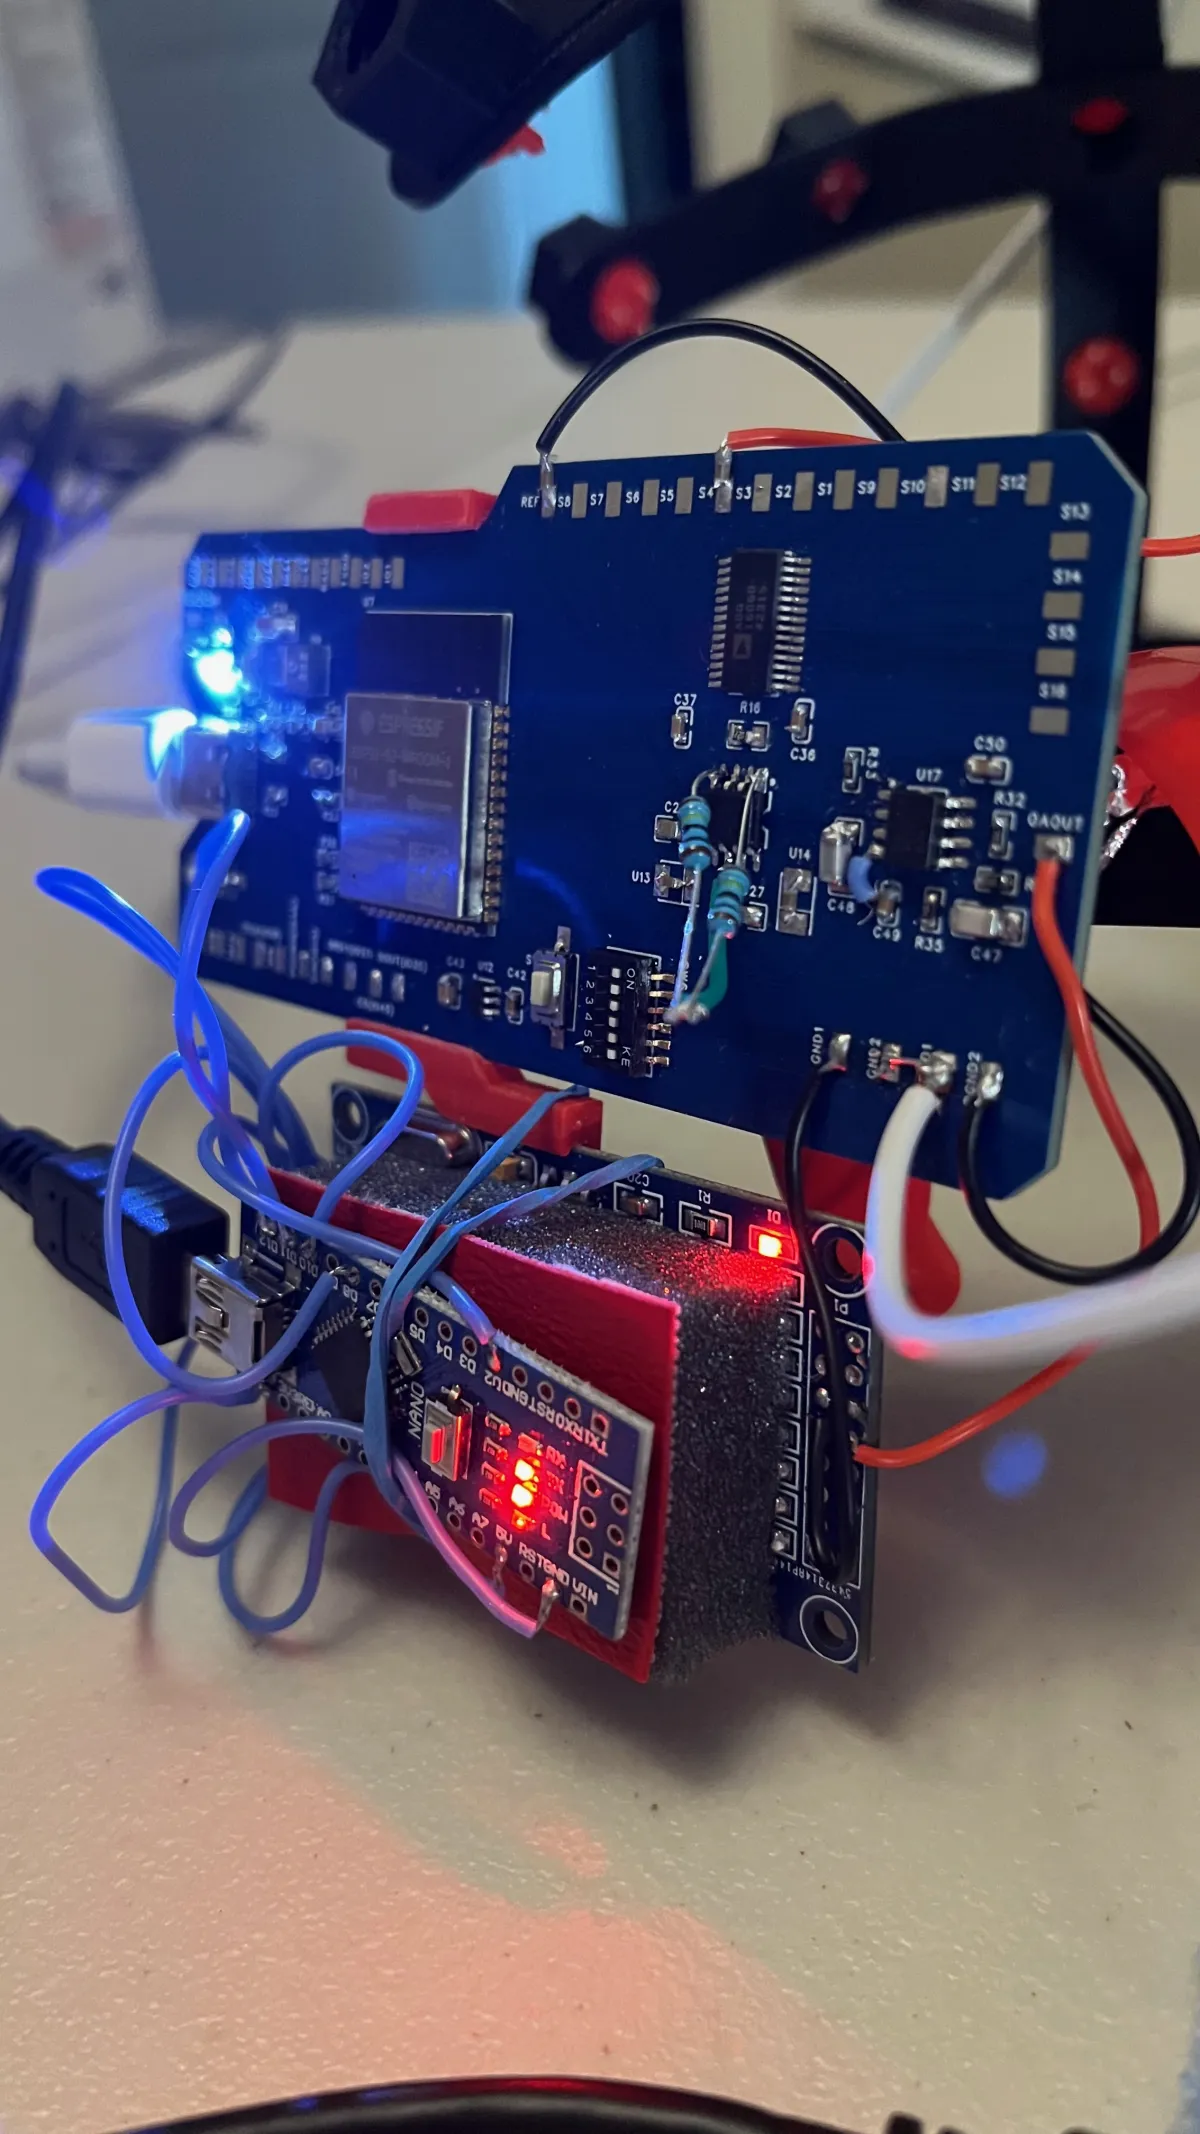
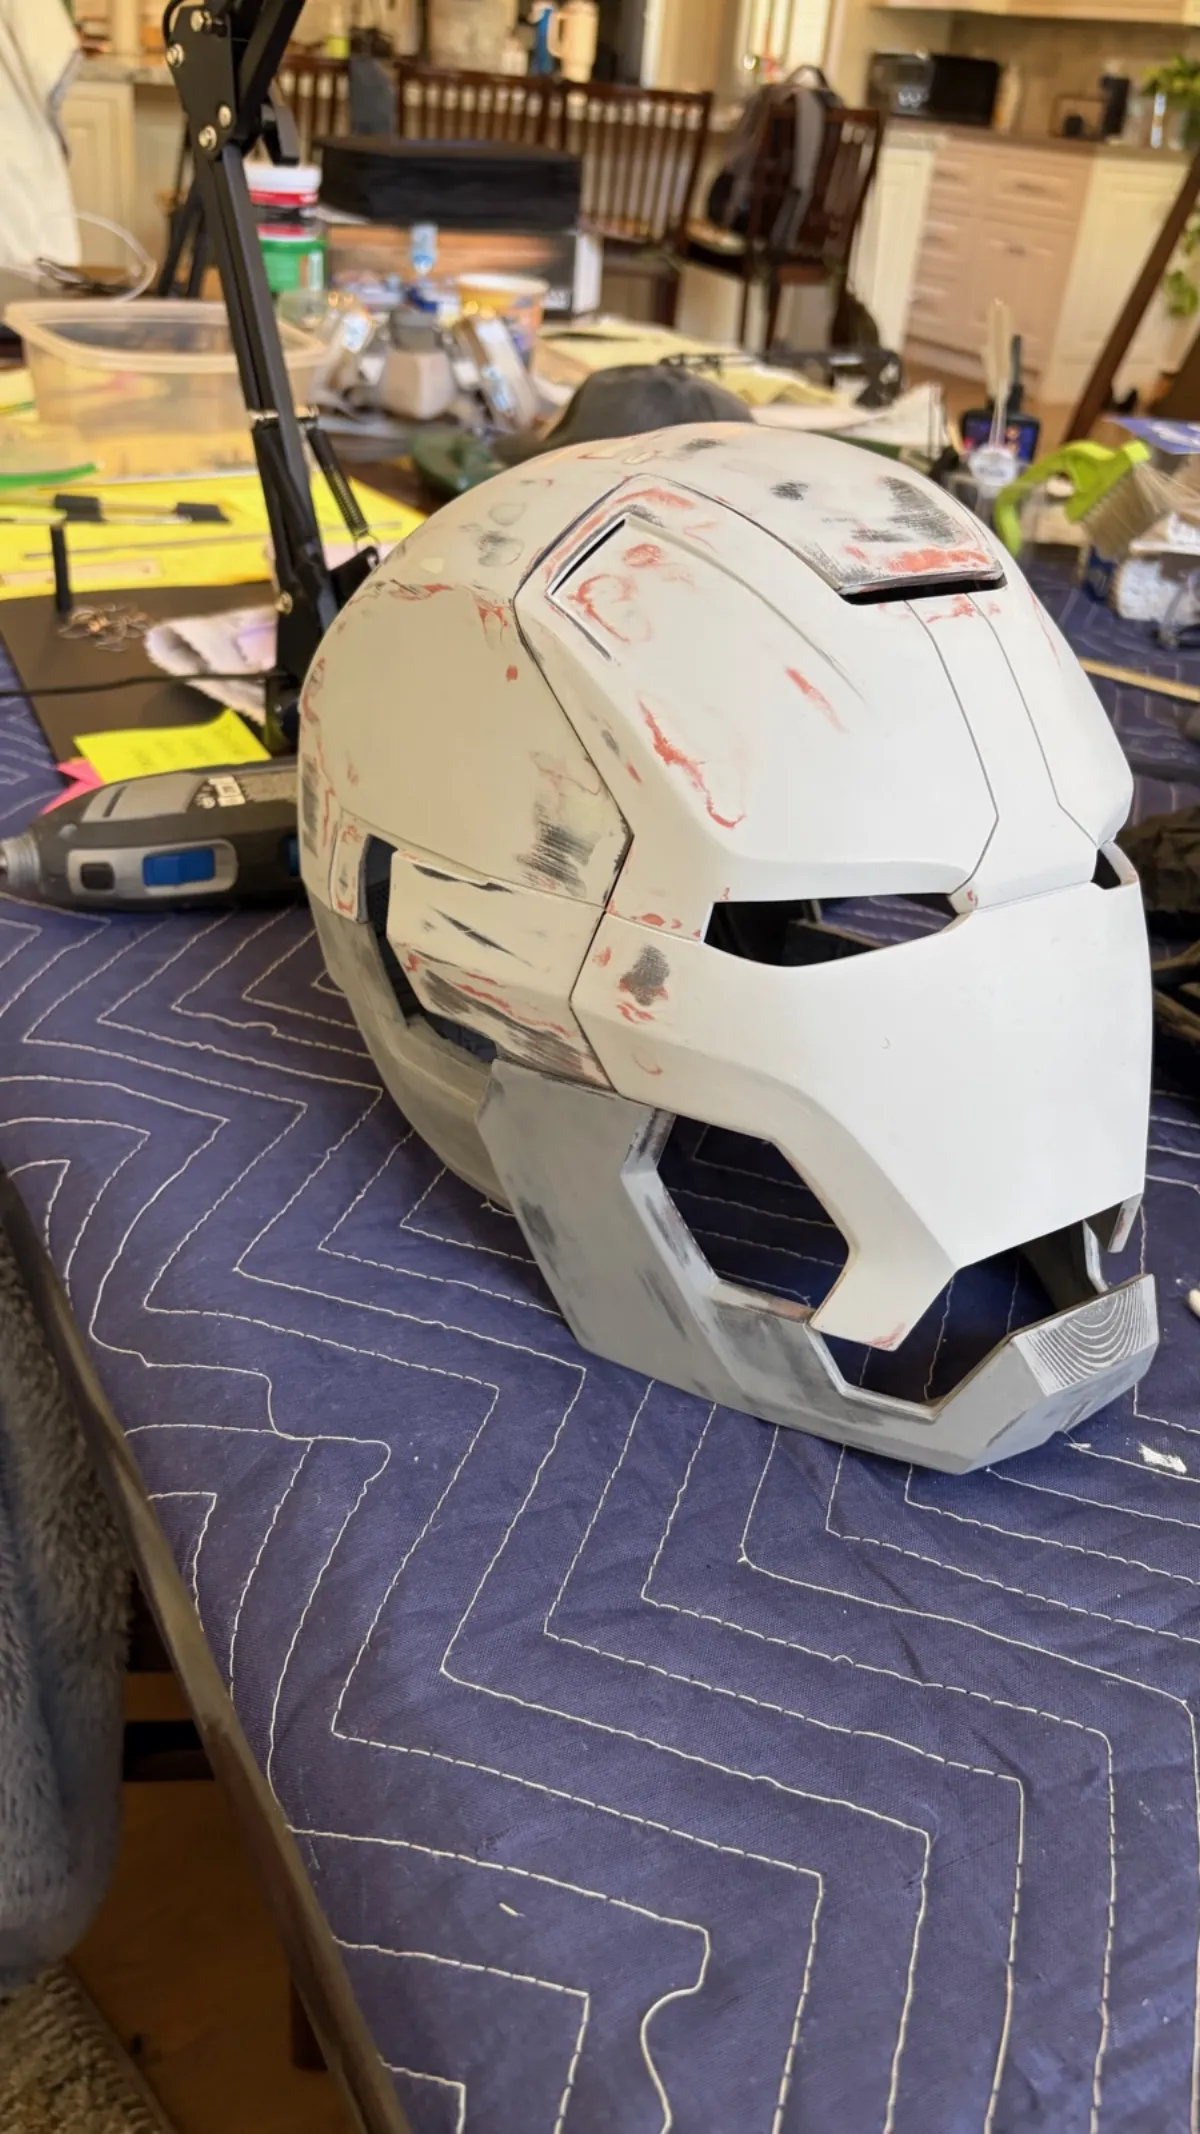
The goal from the start. Before there was a board, there was an idea: open an Iron Man helmet with my mind. The first classifier made that real, using facial patterns on FP1/FP2/T7 to trigger it. That is what the video shows. But facial EMG is not the end goal. The actual target is motor execution and motor imagery, decoding intended movement from EEG alone. Getting there means working through hard unsolved problems like the Midas Touch problem, where the system has to know when you mean to trigger something and when you are just existing. That work is ongoing, along with my Mark 42 helmet to go with it.
Three Boards Later
When I started at 16, I did not really know what EEG meant. I had not opened a PCB tool, I did not know how to read a datasheet, and I definitely did not know why power routing could ruin your entire day. AI helped me close the gaps I could see. The boards showed me the ones I could not.
I thought this would be a lot easier than it was.
The goal was to pick up brain signals as cheap and fast as possible. I did not understand how much placement and routing mattered. I put decoupling caps nowhere near the pins they were for, and parts wherever they fit. I thought an Arduino Nano's ADC could read the output. It could not. And I had not really grasped what EEG takes, so even when I got voltage moving, I had no good way to tell if any of it was real.
More on V1
The board had all the tells of someone self-taught off AI. Caps in the wrong spots, no plan for noise, routing done after placement instead of designed around it. None of it killed the idea though. It just showed me how much I actually had to learn.
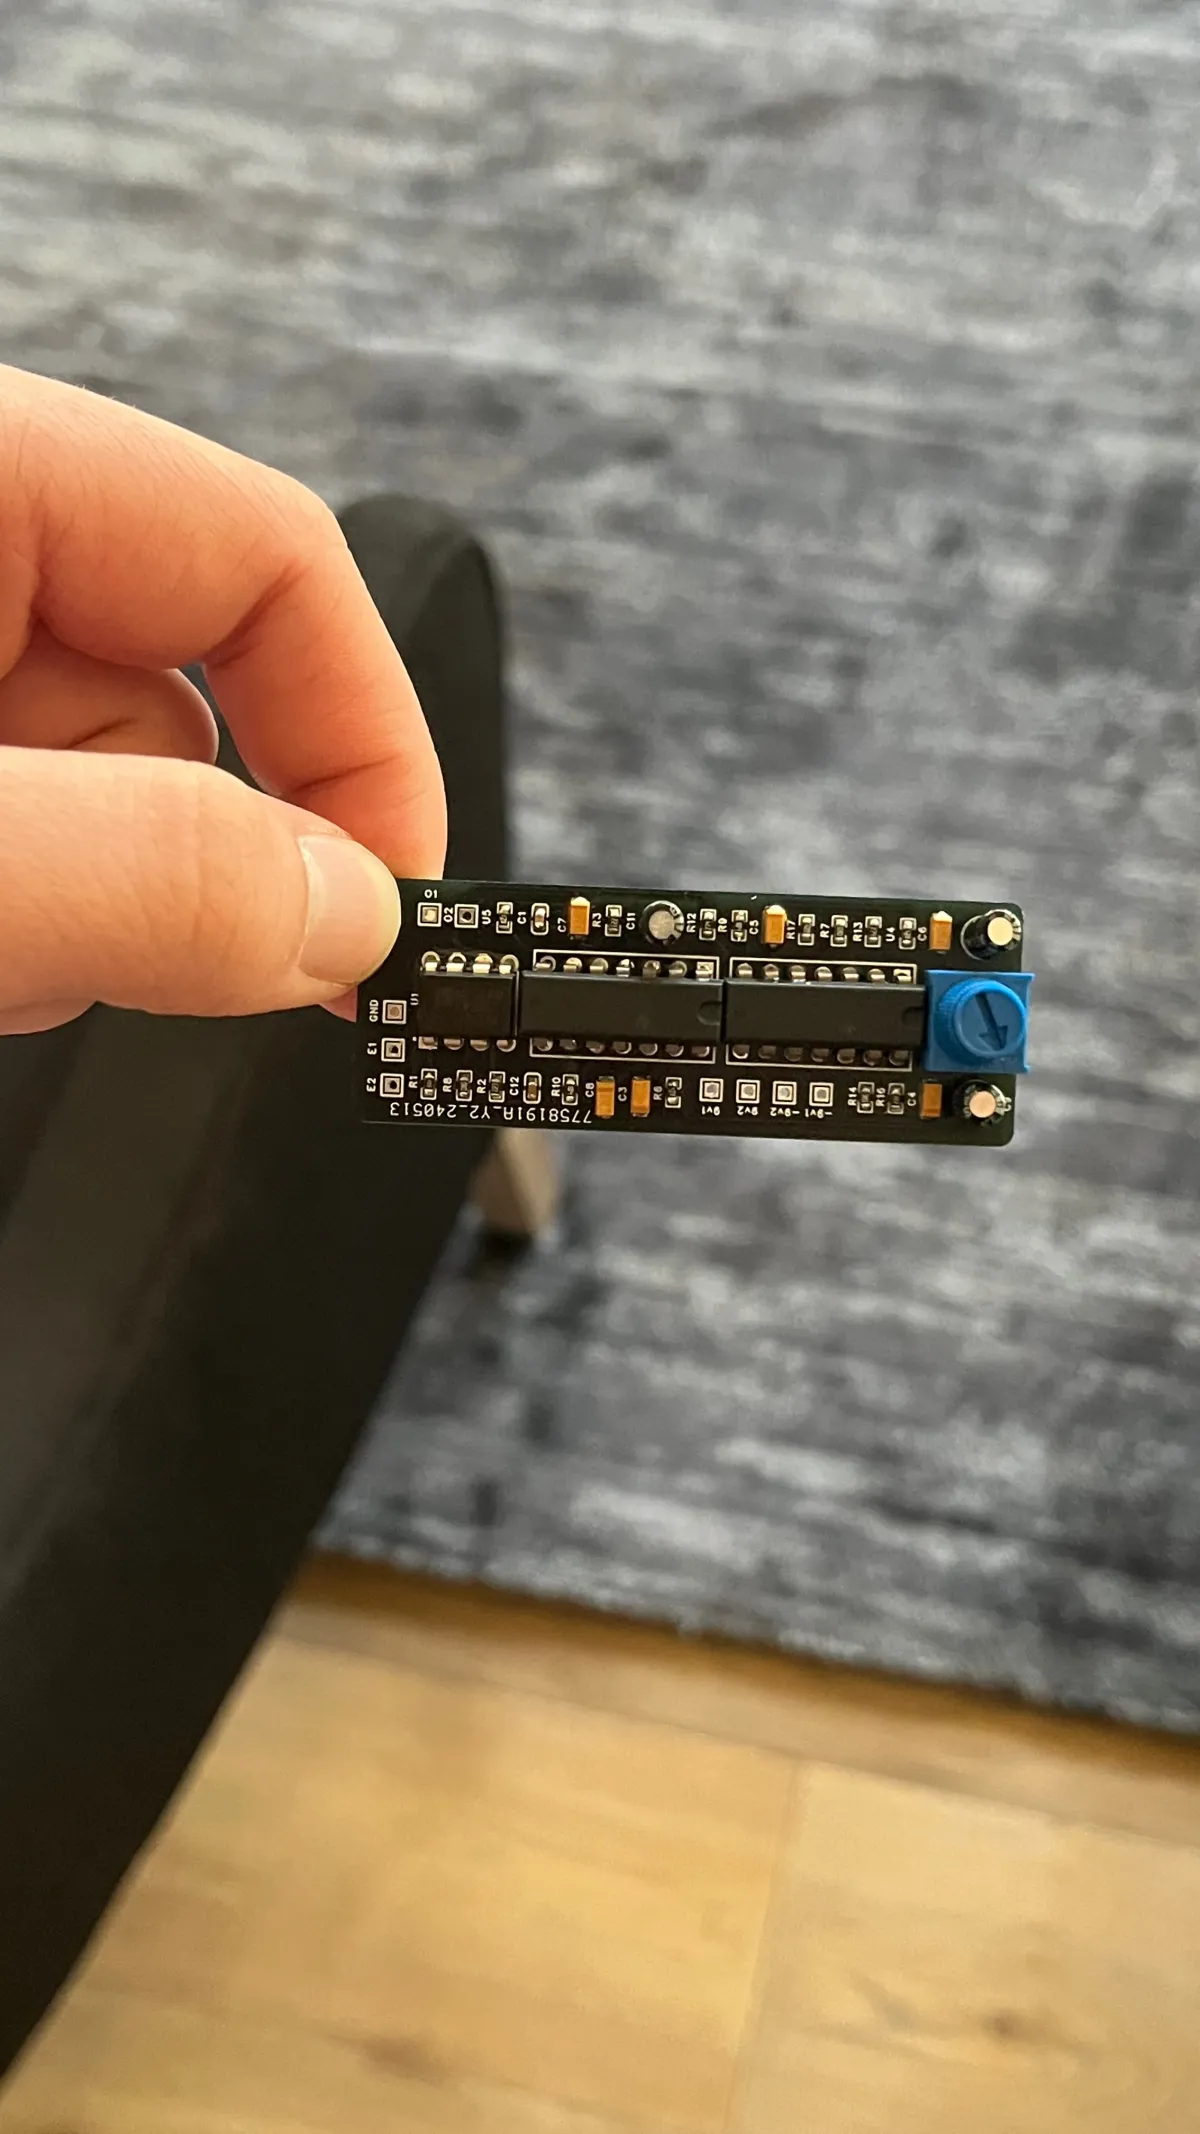
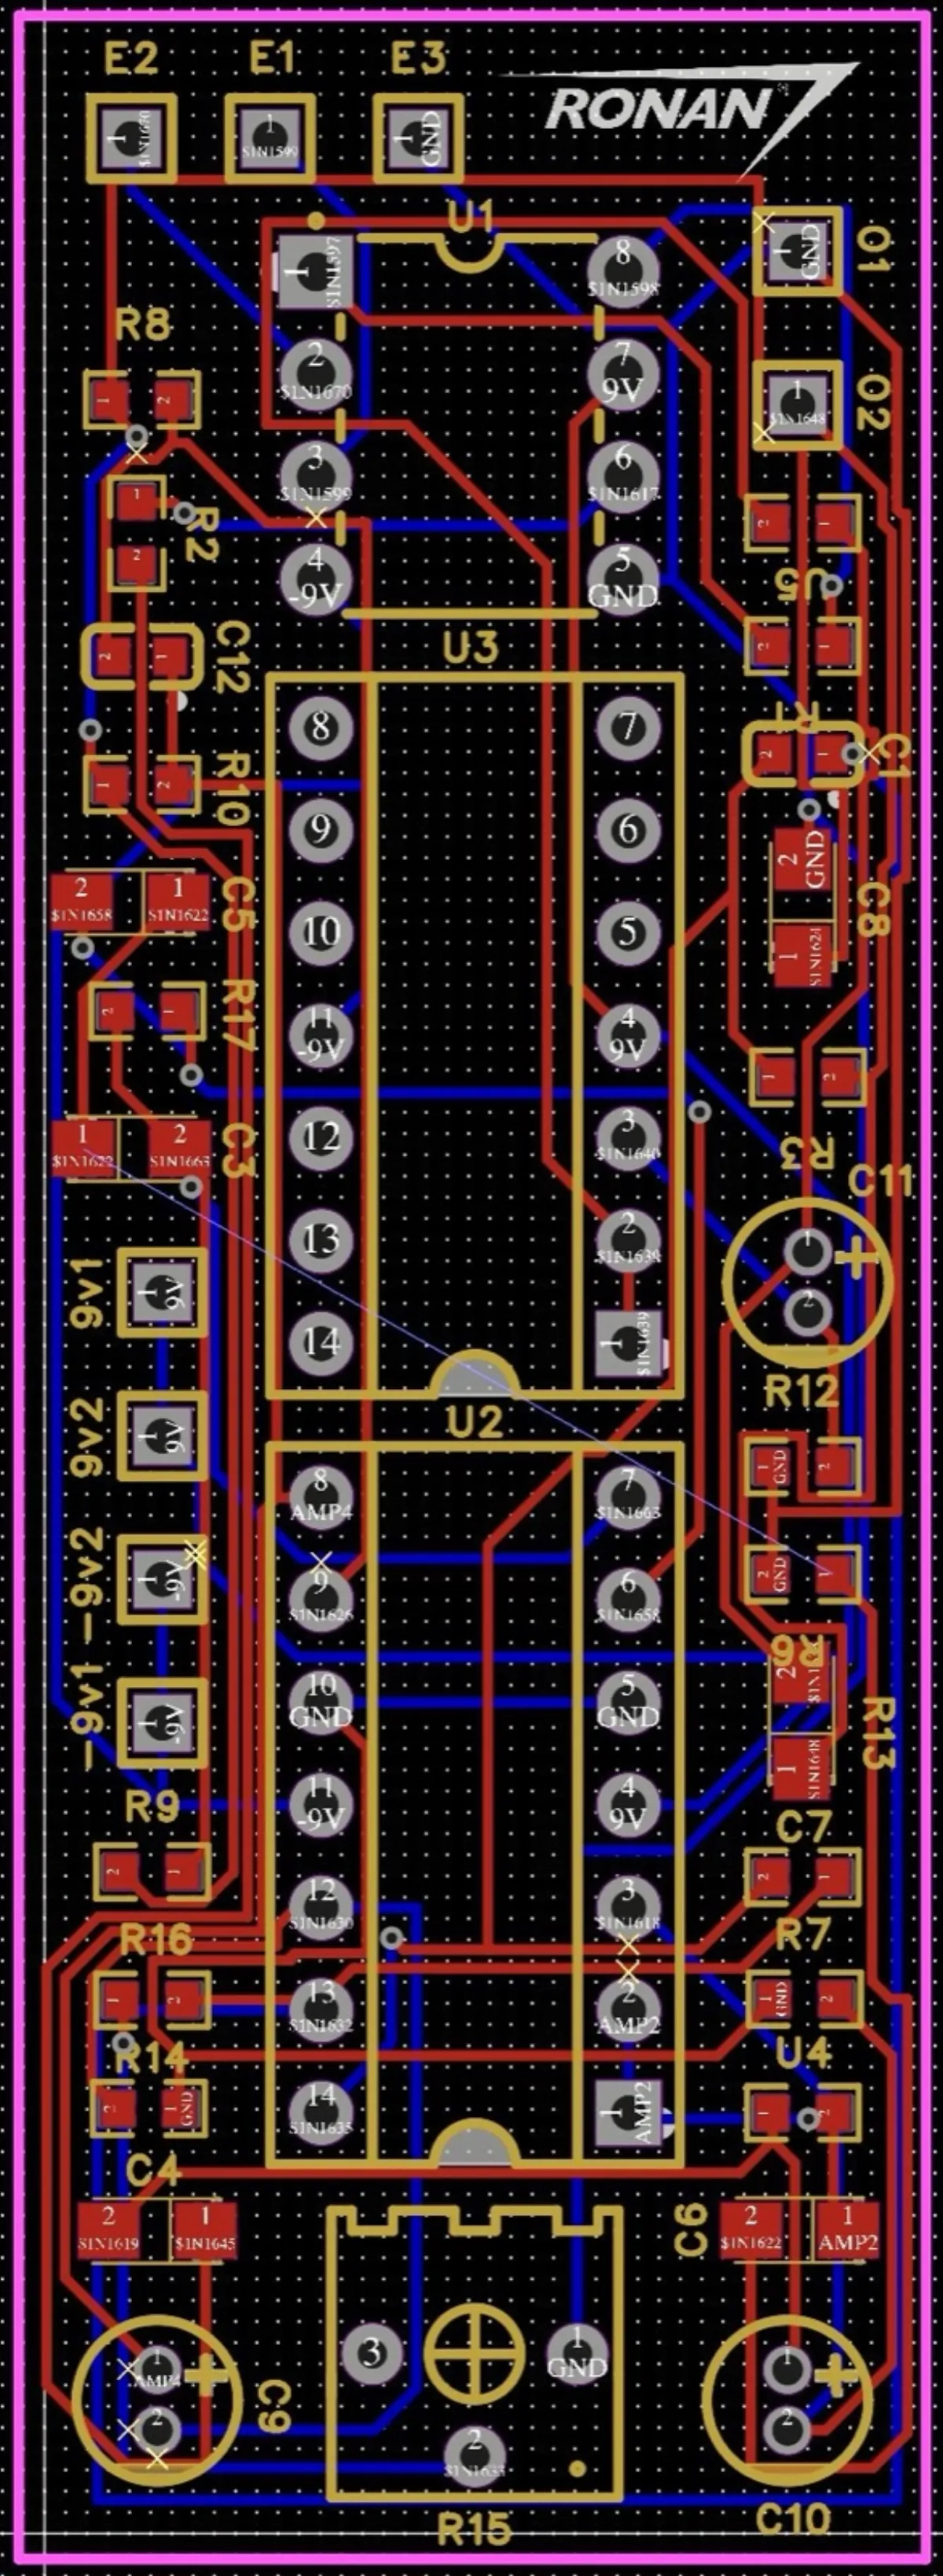

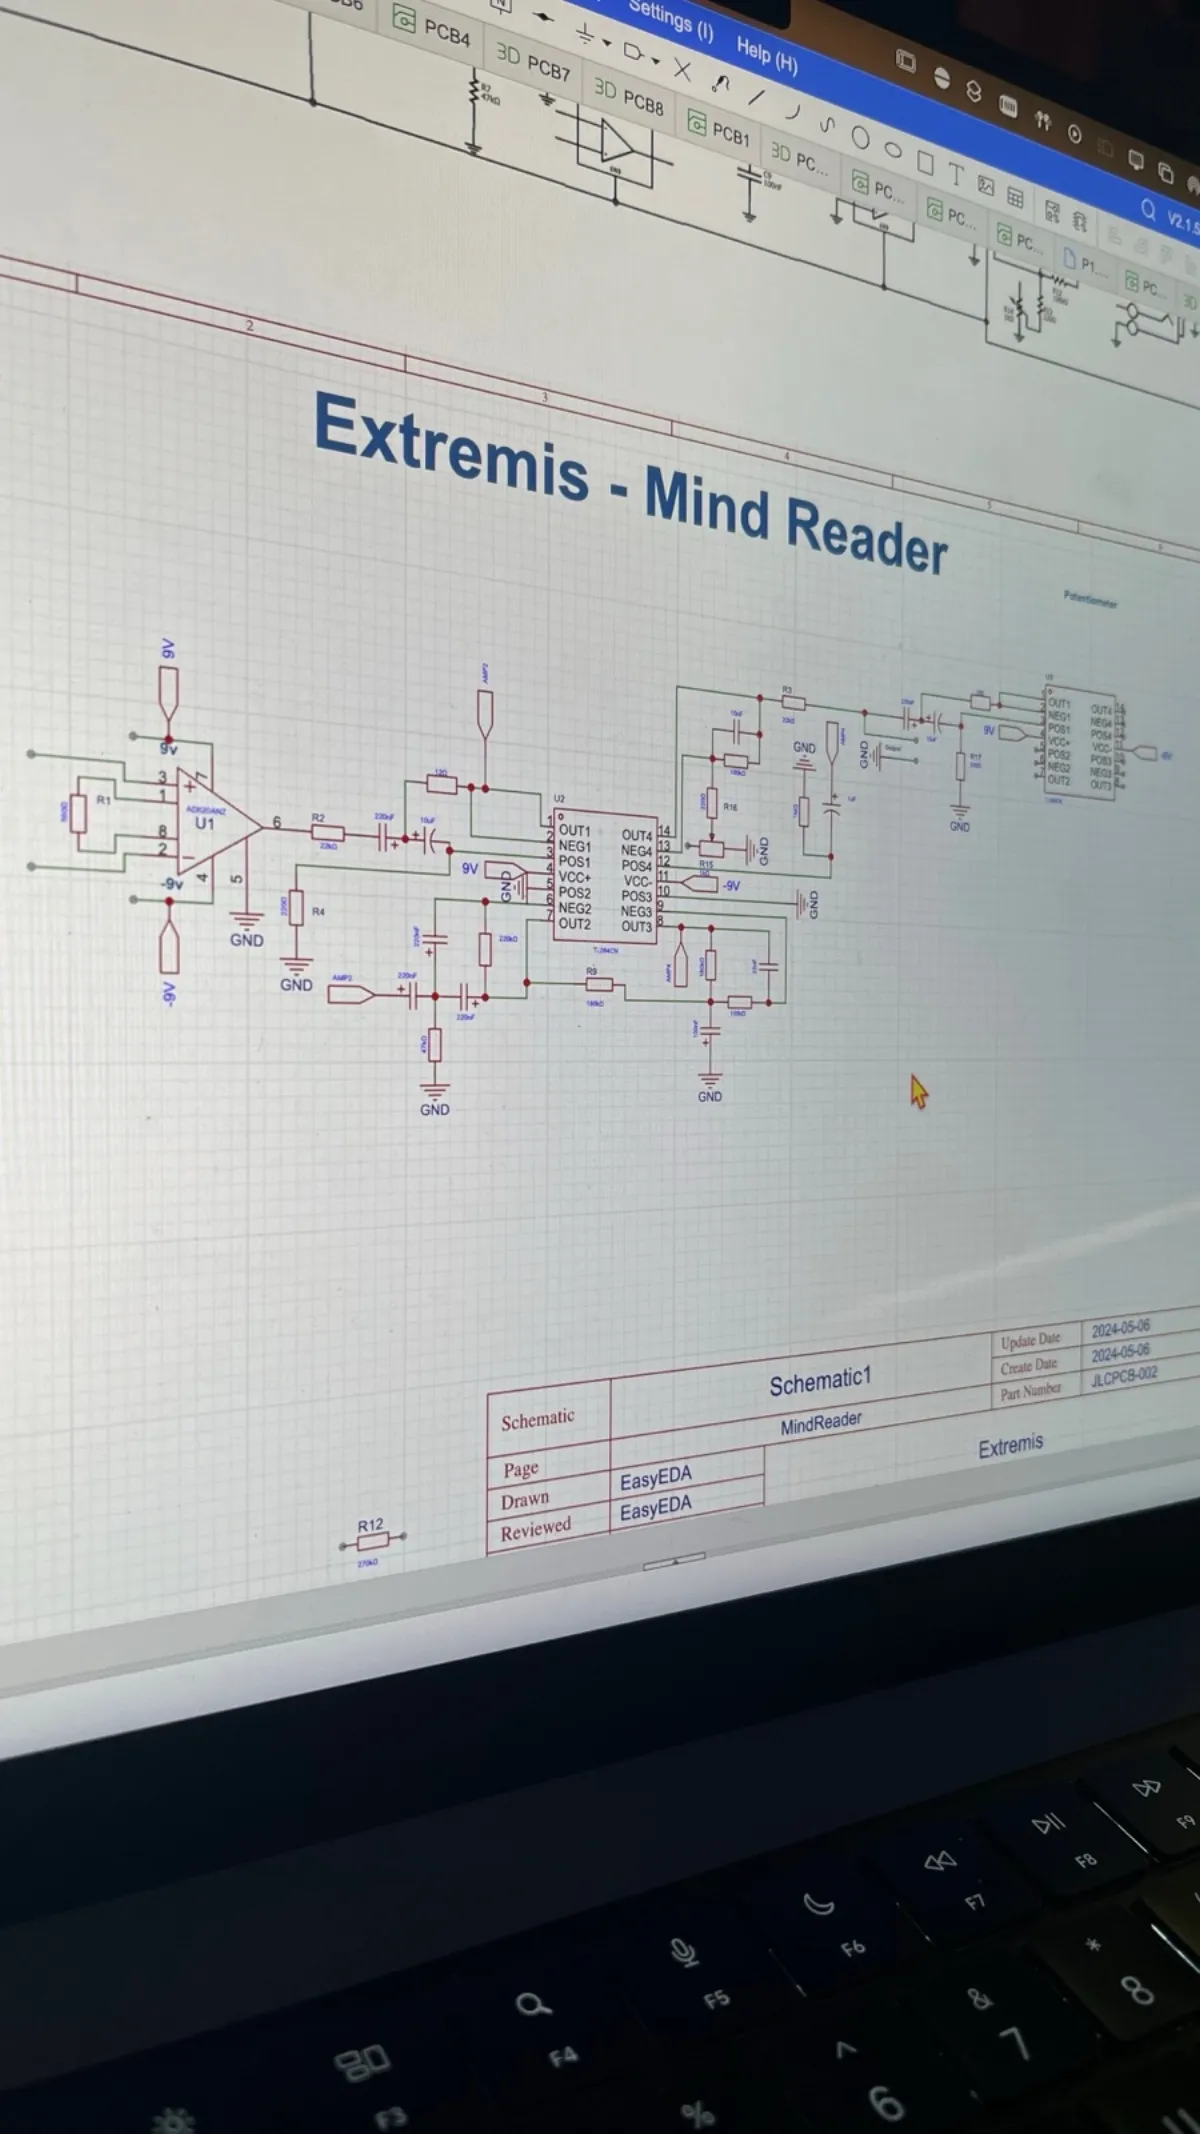
V2 was my first real attempt at understanding EEG.
This was my second PCB and my first serious attempt at a full EEG system. It had an ESP32 on board, amplifiers and filters, an external ADC, and sixteen electrode channels. The whole design and parts list came out of working with GPT-4, hunting down the lowest-noise amplifiers and ADCs we could find. I also designed the headset and made dry electrodes from silver wire after teaching myself way too much about plating, silver chloride, and why electrode materials matter.
More on V2
The thing fought me constantly. I had tons of power problems. The electrodes picked up 60 Hz like crazy. The signal drifted, and I had to start learning digital filters just to make sense of what I was seeing. The headset copied the Iron Man idea of putting REF behind the ear and GND on the forehead, but in real life the electrodes hurt and were not one-size-fits-all.
About the chip: V2 was still trying to build the EEG front end from separate pieces: amplifiers, filters, then an ADC, with each channel multiplexed into the system. It can work, and this actually showed early signs of success. The problem was that the noise, electrodes, and power made it a headache.
V3 is the first one I built like a real product.
The scary part about being self-taught is that you do not know what you do not know. AI can answer anything I think to ask it, but it cannot tell me what I forgot to worry about. V1 and V2 are where I found most of that out. So with V3 I treated it like a real device. It charges over USB-C and can shut itself off safely. I worked out the annoying little cases, like what happens if the battery and USB are both plugged in at once. None of that ever crossed my mind on the first two boards. This was by far the hardest board I have made. I split it into a clean EEG side and a noisy power and processing side and kept the two from bleeding into each other across six layers. The ADS1299 has strict rules about power and where every cap sits, so most of the work was laying the board out around those rules and keeping the analog side quiet.
This board worked first try. The voltages were right the first time I powered it on, the firmware talked to the ADS1299 on the first flash, and I saw real EEG the first time I tested it. The headset is still in progress and so is the Iron Man goal, but V3 is the first board where it felt like I could actually get there.
More on V3
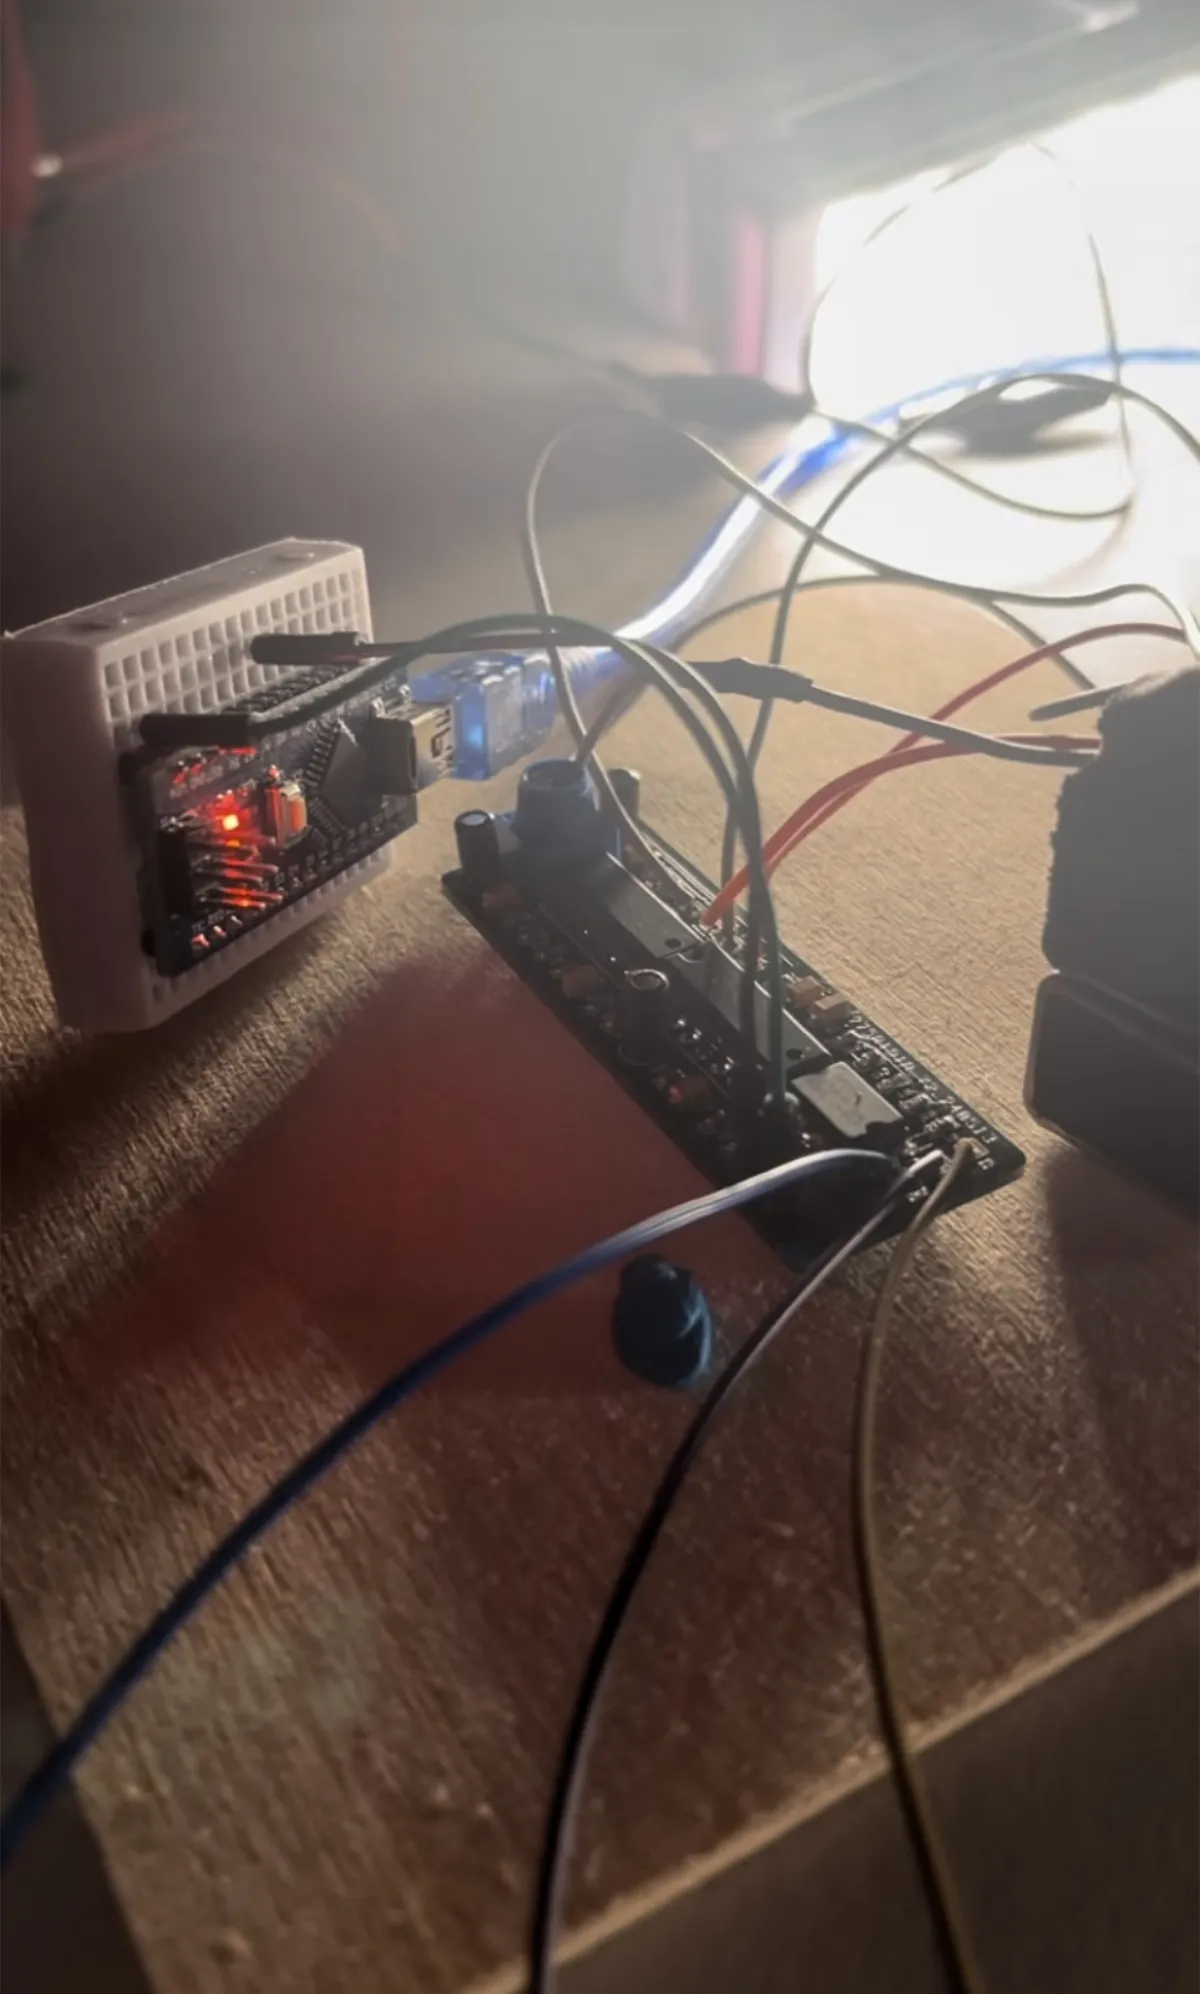
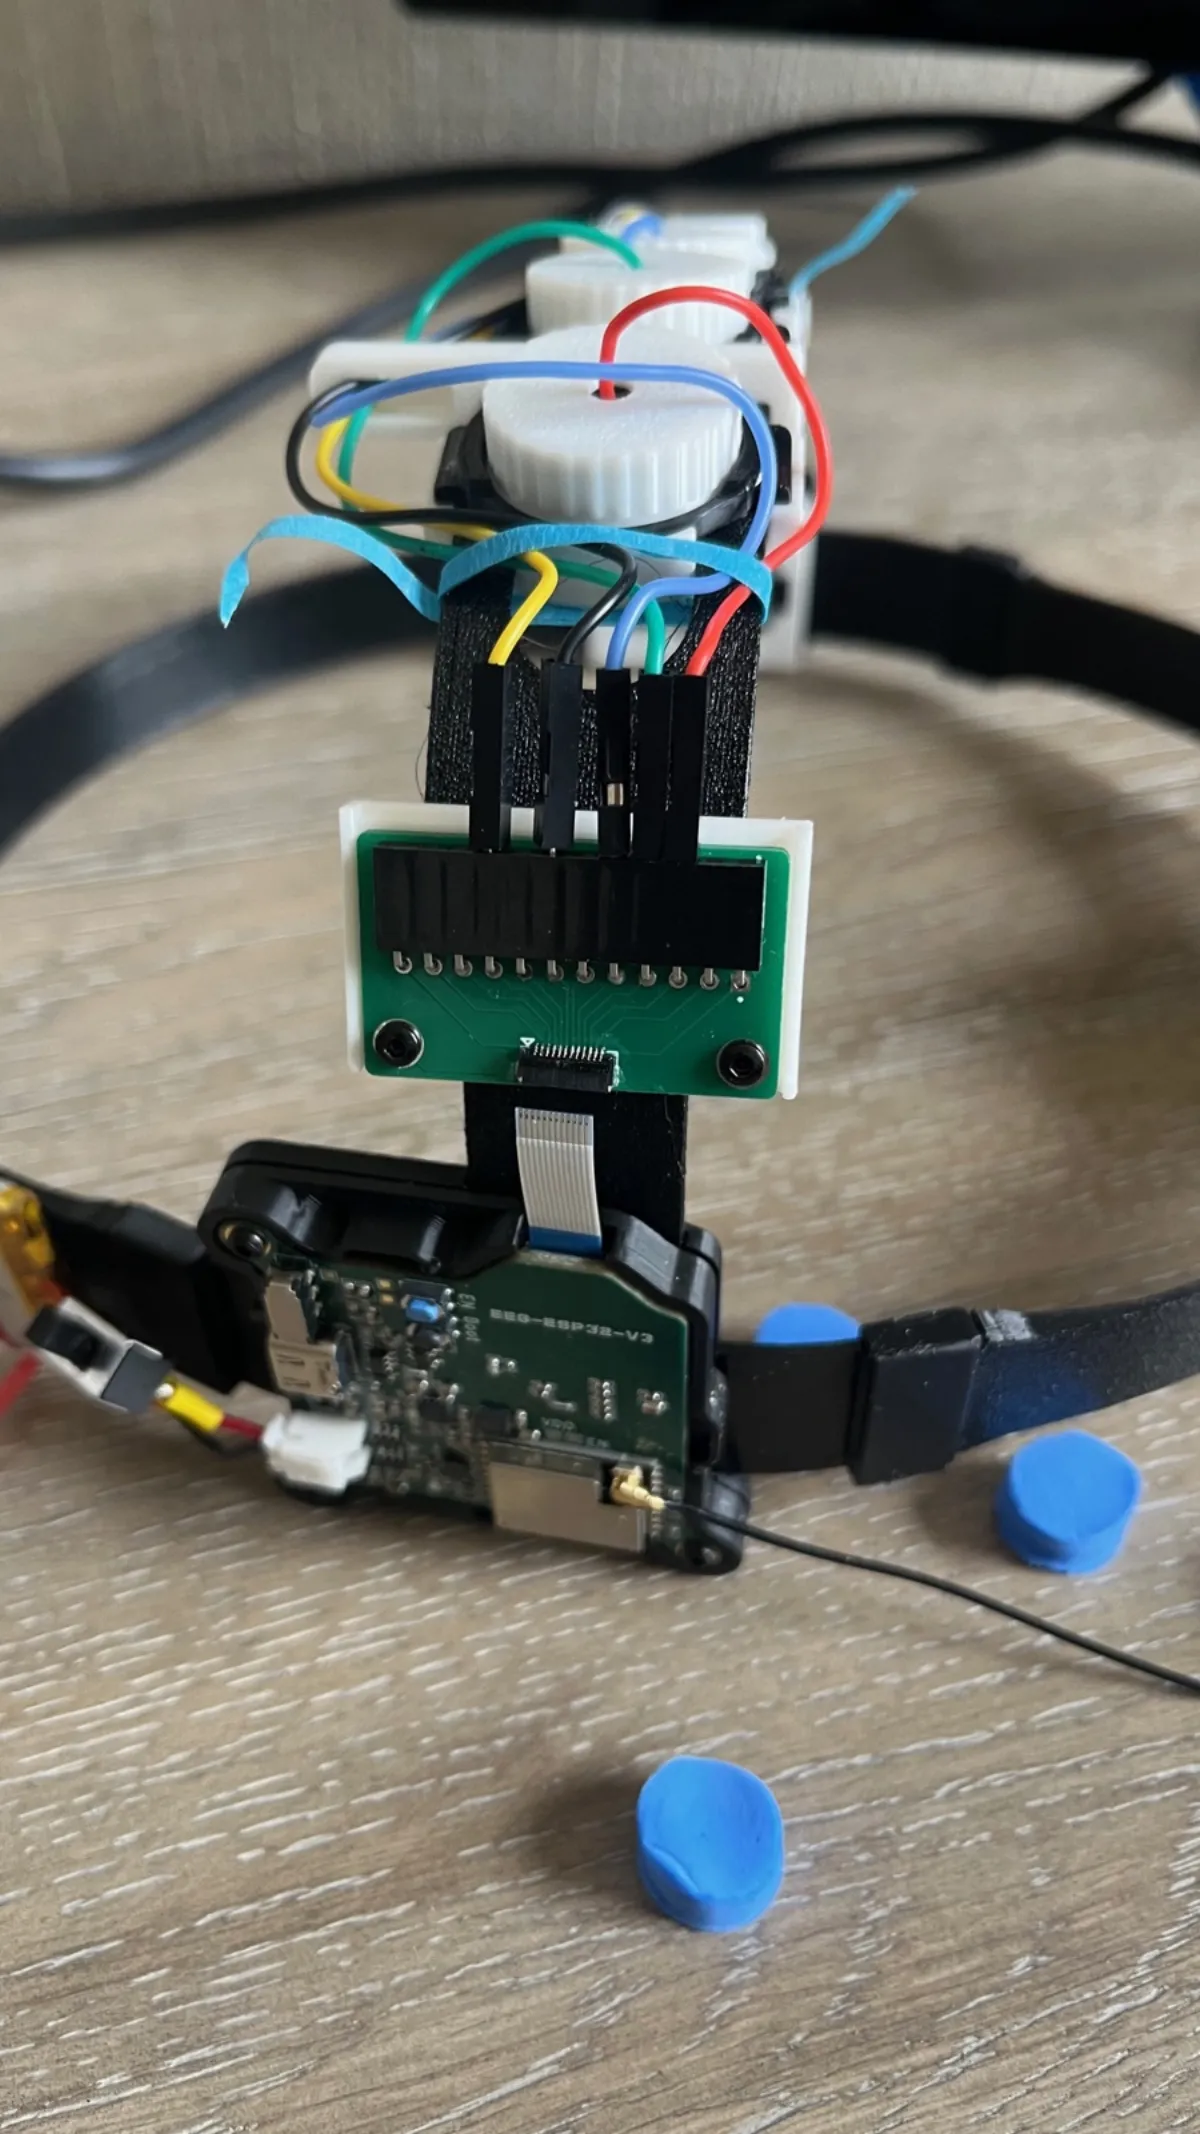
I ran the electrodes off the board through an FPC cable, then built a handful of small boards that plug into it: breakouts to female pin headers, adapters for different electrode connectors, and a phantom board that simulates a head so I can inject known signals and test the whole system without anything on my scalp. V3 also dropped from sixteen channels to eight, but those eight are much cleaner and easier to reason about.
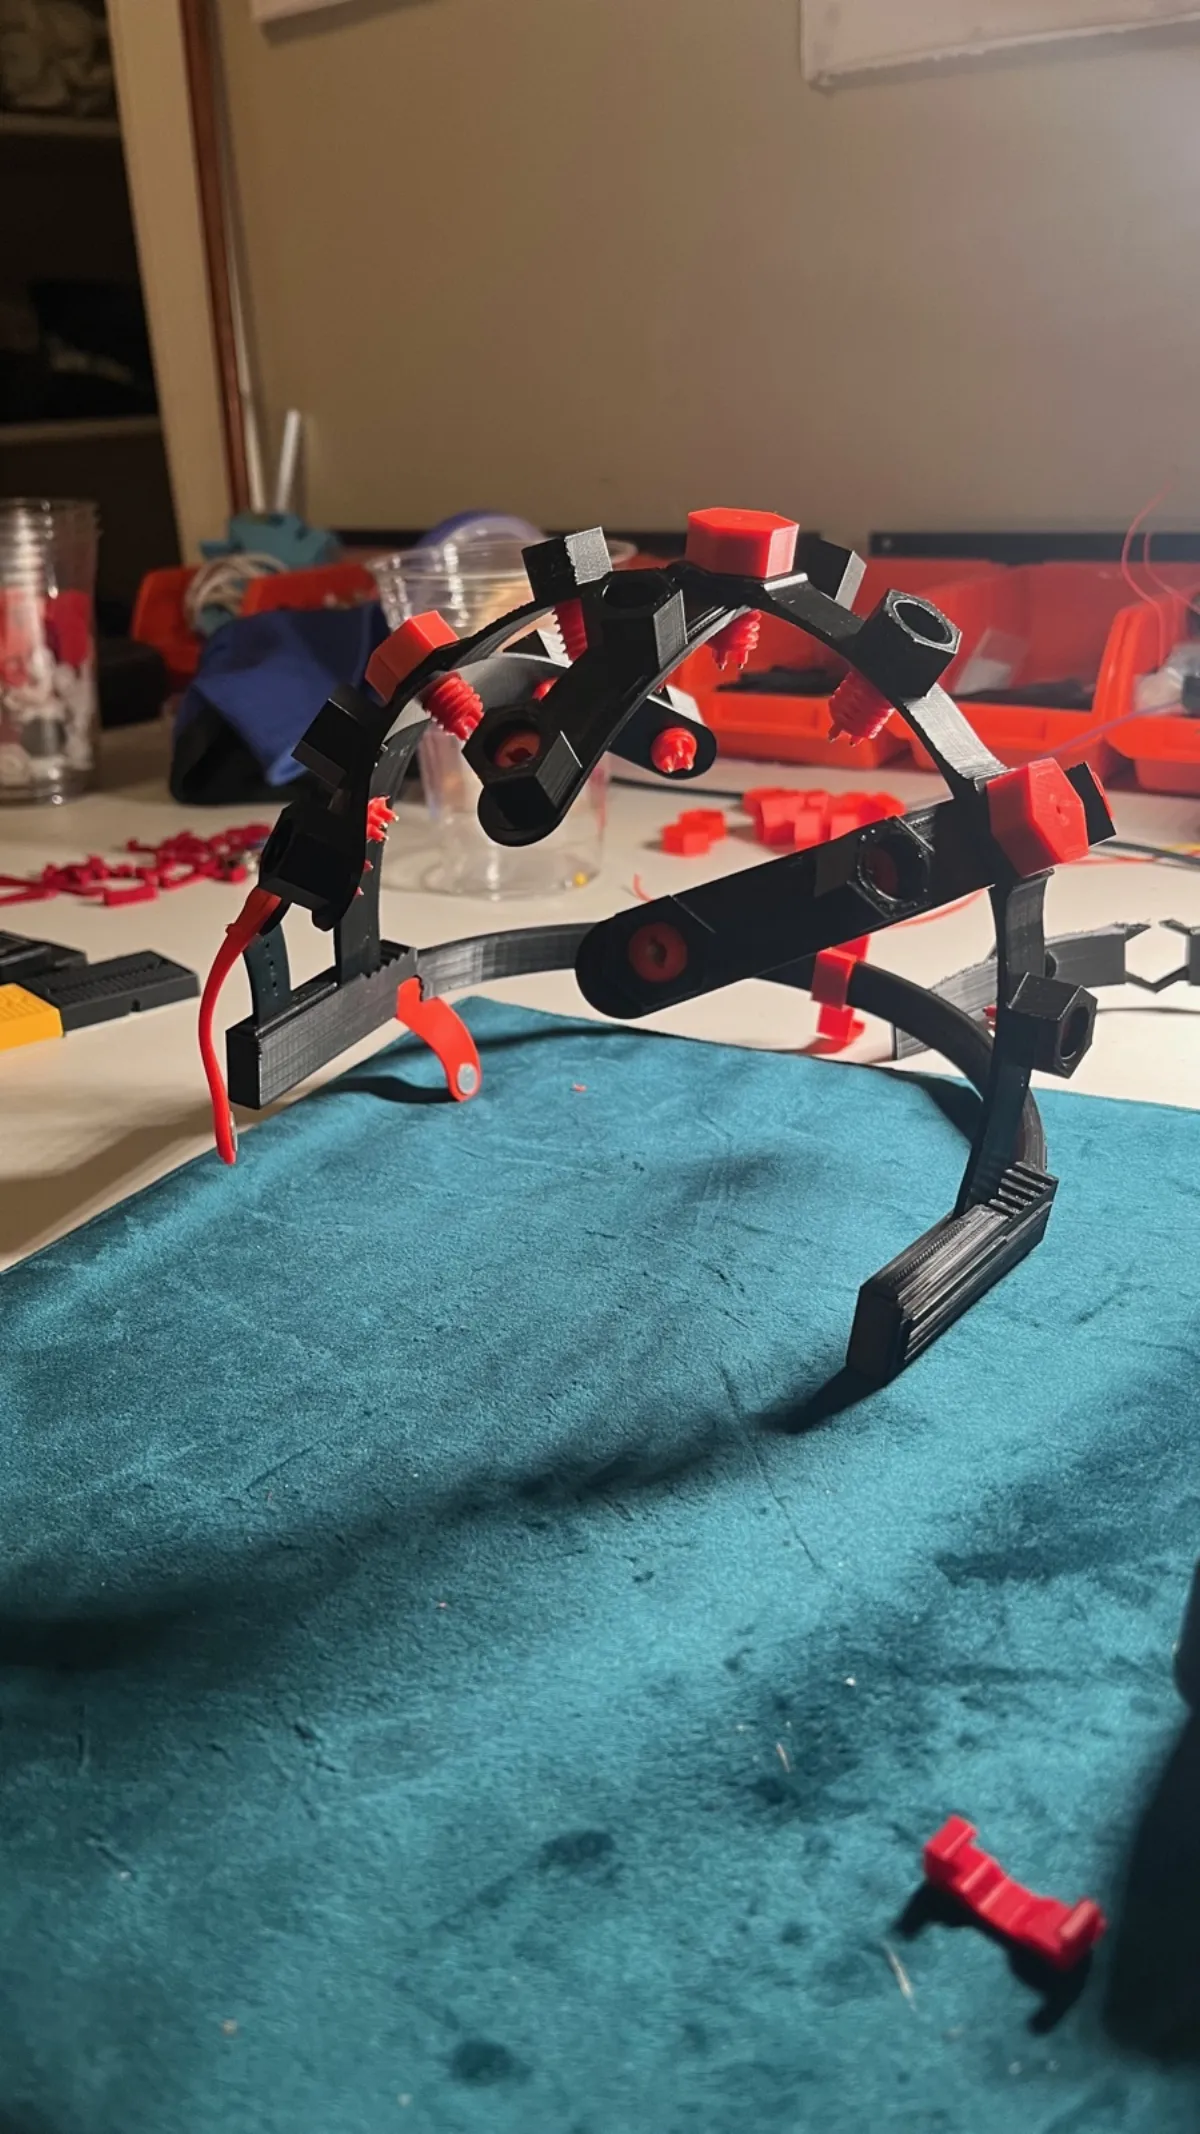
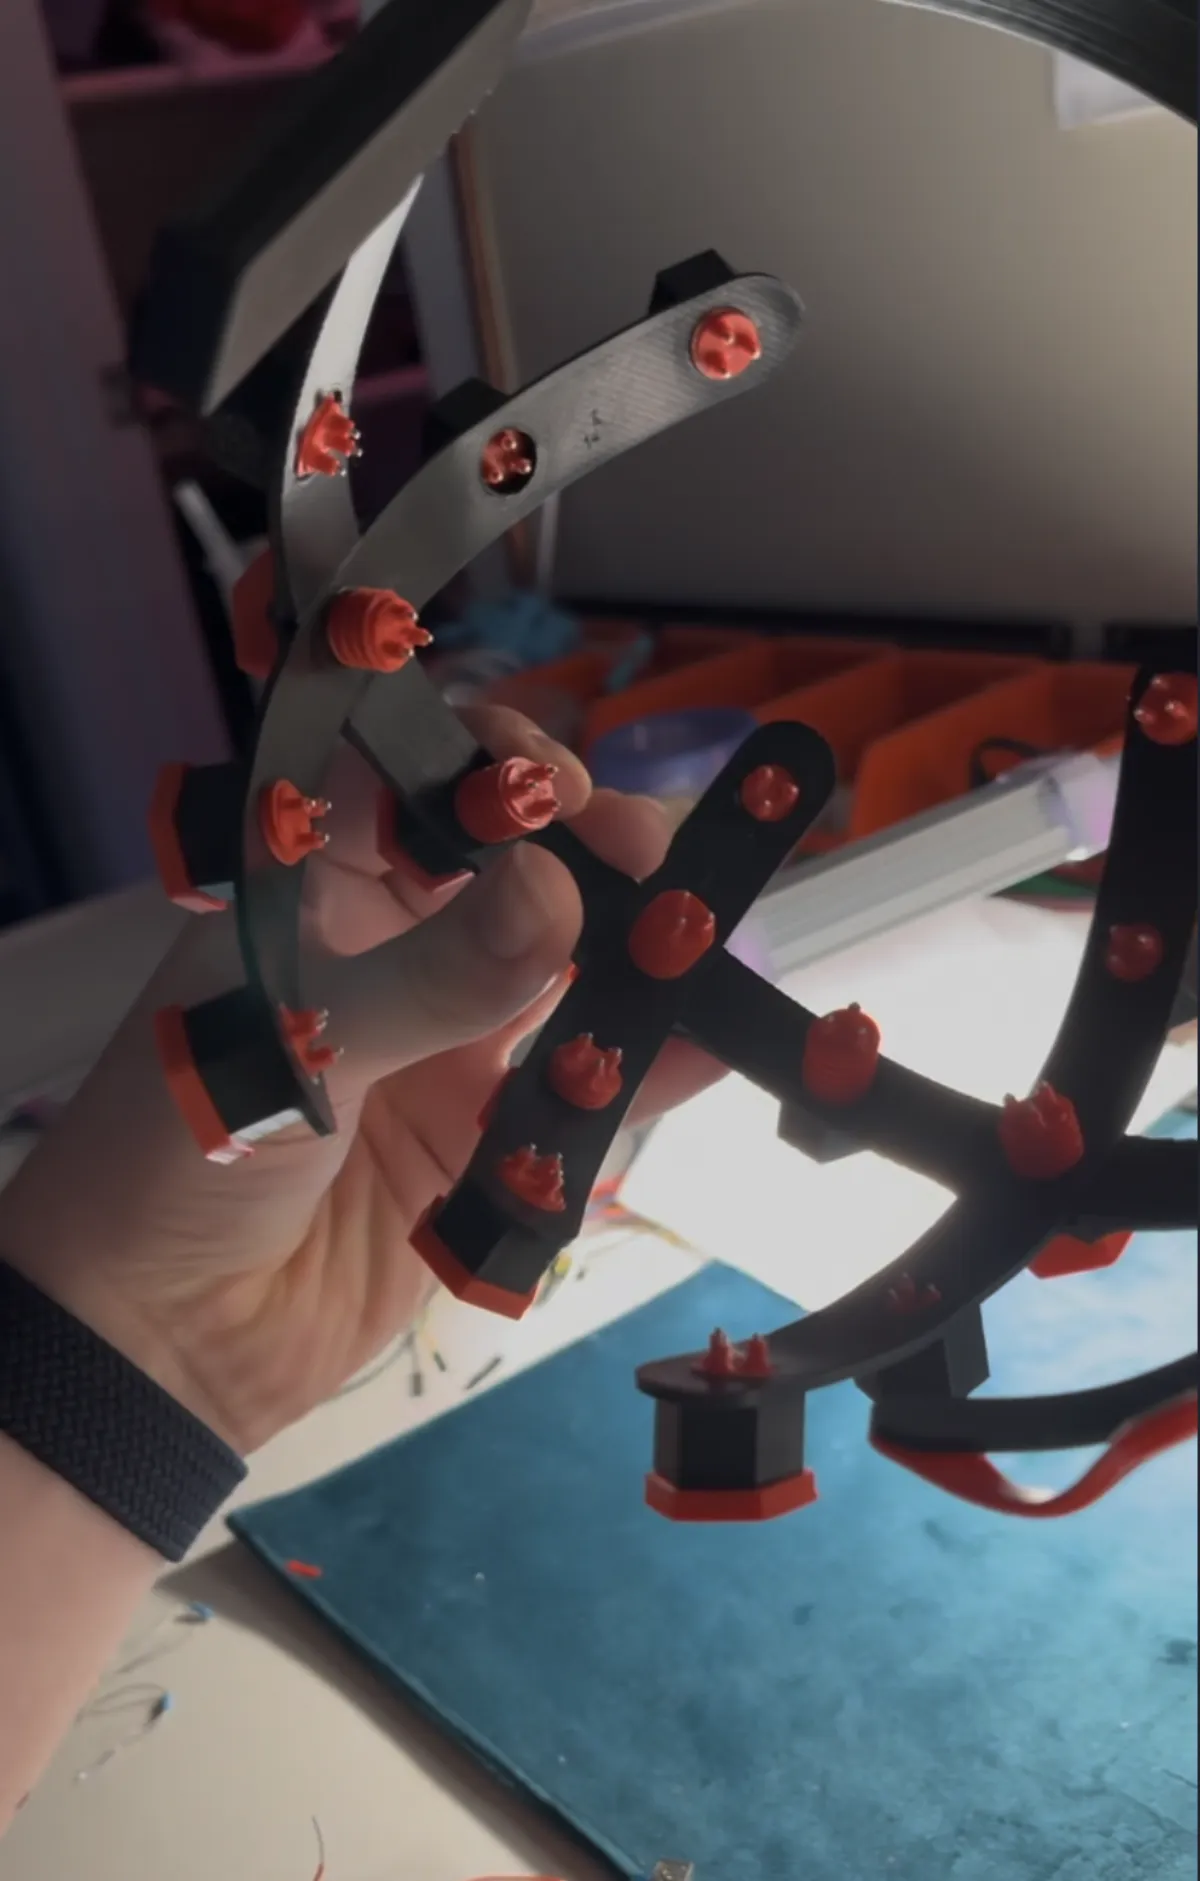
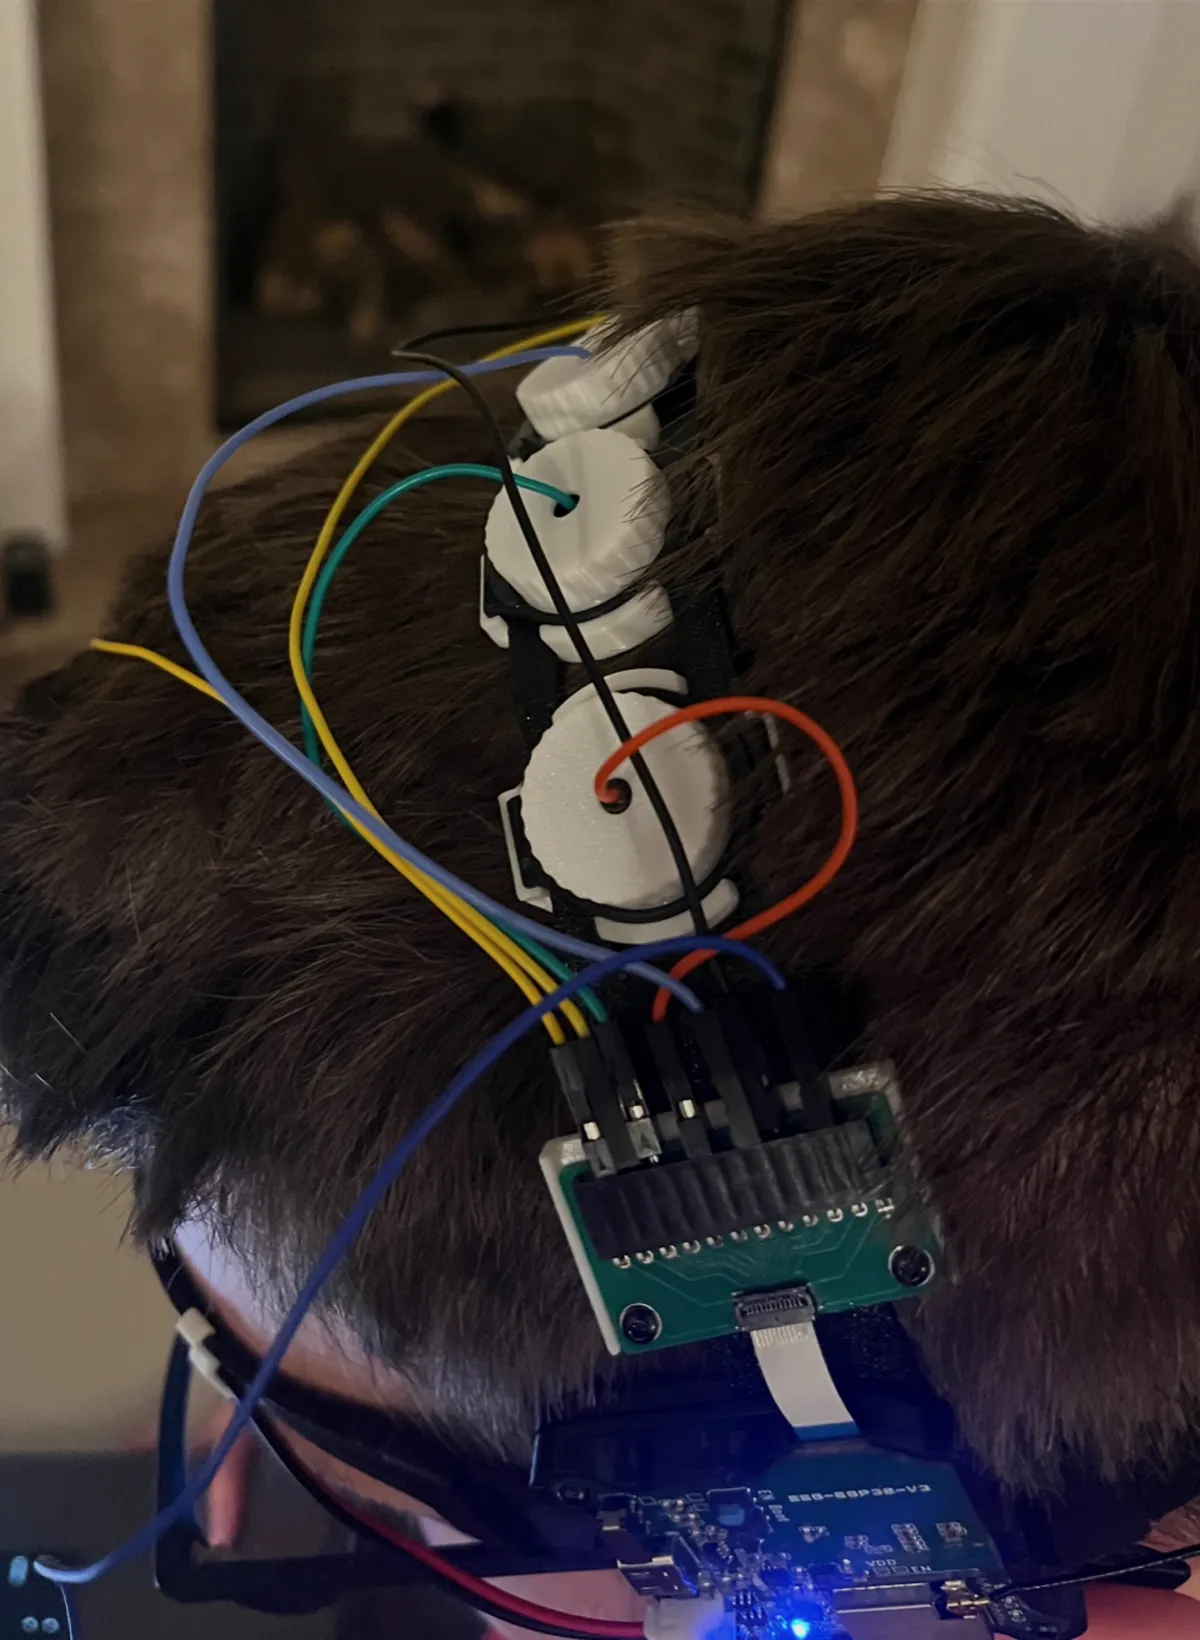
Headset, still in progress: I wanted something anyone could put on. The electrodes are the part I have spent the most time on. They are semi-dry: a saline and glycerin mix held in an absorbent sponge, with a silver chloride wire as the contact. I read through a pile of papers and patents, with AI helping me follow the chemistry, before landing on that. Every electrode has its own knob, and twisting it drives the electrode down or back up through the hair without rotating the contact against your scalp. One more knob on the back tightens or loosens the whole headset, turning either direction. With this setup I usually get around 20 to 30 kΩ of contact impedance, and I have seen it drop into the low 10s.

At 15, I was doing things I thought were impossible. Things that had only ever been dreams. All just from learning how to use AI.
Ronan Grant

I'm a 19-year-old self-taught builder from Utah. I have been making things since I was a kid, doing Arduino and robotics before AI was around to help. I picked up AI early, at 15, and saw right away what it could do for me. I graduated high school a year early so I could spend my time building real projects and learning with AI.
The BCI Project is not a finished medical device or a polished product, but it shows I can drop into something I know nothing about and end up with real, working hardware and software. I'm comfortable not knowing how to do something yet. That is basically the whole job for me. I use AI to research, design, and debug, but none of it counts until it actually works.
I'm looking for hands-on engineering work in robotics, hardware, AI products, or any team building real things. An internship would be ideal, but I'm open to full-time or anything else that gets me building.